Sunday, November 28, 2010

The Ultimate Fortune Cookie Soap Recipe

In a prior post, I shared what I was planning for my Annual Girls Soaping Night Out Event. This weekend, I've been finalizing the projects AND most importantly, have fined-tuned the fortune cookie soap. After several less than perfect batches, I have finally arrived at the Ultimate Fortune Cookie soap. It's very easy and once you make a trial and error batch, you will get the hang of it very quickly.

For my event, I elected to prepare all the fortune cookie soaps ahead of time. We have a number of projects and our time is limited. Having to melt, color, scent, pour soap... then, wait for it to set up, form the cookies, insert the fortunes.... too much time for a large group. Instead, I put together a kit with 6 undecorated fortune cookie soaps, a clear take-out box, ribbon, a colorful gift card (blank), label that also lists the ingredients, a clear cello bag, and a small amount of white paper fill.


Pictured above is the fortune cookie soap kit each lady will receive. Their project will be to decorate their six fortune cookies. I'm keeping it simple by drizzling dark chocolate and mocha colors onto the front and back sides of the soaps. A sprinkle of cinnamon powder and those cookies will be looking fantastic and good enough to eat. You could decorate with any colors you like and even add a few sprinkles. But our event goal is KIS (Keep It Simple).

The other projects include a layered body butter whip, s'more soap, and a gelato bath fizzy. OK, enough said. Let's give you the ultimate fortune cookie soap recipe.

  • Melt 12 ounces of white FLX soap base in the microwave (the FLX soap base is a must as it allows for more flexiblitity in forming the cookies). Do not overheat. I use a 5 setting on my microwave. Cubing the soap first, helps the soap to melt faster.

  • Remove from microwave and stir. You want to ensure there are no unmelted lumps. Once you have a smooth consistency, add 2 teaspoons of water and 1 teaspoon of liquid vegetable glycerin. Mix well.

  • Now add color and fragrance. I used 1 to 2 drops of Leaf Brown colorant to help diminish the starkness of the white base. You can color however you like, but I do recommend using the liquid gel colors that we offer. I used 3 teaspoons of our Cinnamon Bun fragrance oil.

  • You're ready to pour. I used both the 9 inch and 8 inch jelly roll pans. I wanted to test both pans and they work equally well. The 9 inch pan yields five circle cut-out when using a 3 1/2" round cutter. The 8-inch pan yielded four. When pouring, you want to keep the layer relatively thin (around 1/8" in thickness). The 12 ounces of melted soap will easily filled both the 9-inch and 8-inch jelly roll pan.

  • You can use a smaller circle cutter though I don't recommend going less than 3 inches in diameter. Experiment with different size circle cutters to determine what works best for you. You can even use a plastic cup. You will be amazed at how many items you have around the house that might work well as a circle cutter.

  • You will want to pay close attention to your poured soap at this point. You need to remove it from the jelly roll pans while it is still pliable but not so pliable that it hasn't set up. The first time you release too early... you will immediately get a feel for you next batch. Don't despair, you can remelt the soap base and start over. Just don't add any additional water, glycerin, color or scent.

  • Turn out the soap onto a cutting board and cut out your circle shapes. Fold the circle in half and gently pinch the outer edges together (gently!) You will have a half moon shape. Place your index finger in the center of the soap (where the fold is) and gently fold the soap into a fortune cookie shape. It might take a few tries, but you'll eventually get the hang of it. If you do have any flub-ups, just remelt when making your next batch.

  • Place the extra soap from the cut-outs onto a soap scale to determine weight. Add the difference in FLX white soap base to equal 12 ounces. Place this back into your glass measuring cup for your next batch. You will need to be careful when reusing the soap base from the cut-outs. This base has already been scented, colored, and contains the water/glycerin additives. You may find it easier to just save all the soap scraps until you have enough to equal a new batch and instead use a fresh batch of the FLX white base for your next batch.

  • I found it much easier to make the fortune cookie soap first BEFORE adding the printed fortune. After letting the soaps set up for 5-10 minutes, I then inserted the printed fortune inside the cookie. Gently separate the fold of the cookie and slide in your fortune.

  • Decorate your soap cookie any way you like. In fact, you may elect to not decorate at all. The possibilities are endless.

I told you it was easy. Good luck and BTW.... I am including a link for you to print out fortunes!

Friday, November 26, 2010

A Little too Much too Drink? Hmmmm....

OK, call my family a bit kooky, but that's what you get when you have a husband in the wine business. This knight sets outside our front door and generally holds a bottle of wine. It was part of a wine display that my honey man brought home a few months back.

I had the great idea of hanging this beautiful Christmas wreath on the knight's arm. You know, right next to the bottle of wine that he holds in his other hand. Well.... as you can see, my knight in shining armor may have had too much to drink.


When the guys from my carpet cleaning service arrived this morning, this is what they found. Their first comment was, "I think the man outside your door had too much wine yesterday". Sure enough, there was my knight face down on the deck and definitely two sheets to the wind. If he's going to be drinking until he passes out, I'll make sure he only drinking the cheap stuff!

Hope you are all enjoying your Thanksgiving weekend.

Thursday, November 25, 2010

DIY Gourmet Sugar Scrub Kit...Coming Soon

Body Butter Salt Scrub Kit from GoPlanetEarth.com Last holiday, we offered a Do-It-Yourself Body Scrub kit. It was a big hit and we're offering that same "sugar-salt combo" body scrub kit for a LIMITED time this holiday season. Once we sell out, these kits are gone. I suggest you snatch up your kit today. Whip up a batch for co-workers, use as a stocking stuffer, or give as holiday hostess gifts. We even supply you with the labels. Come'on it doesn't get any easier. If you have ever wanted to try your hand at making your own bath products.... this is the kit for you.

Body Butter Salt Scrub Kit from GoPlanetEarth.com
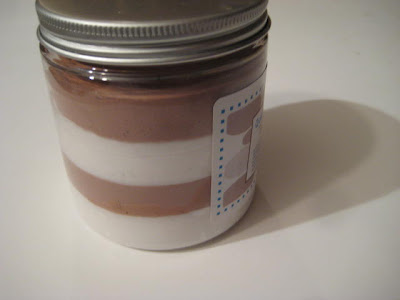
We are offering two kits: Orange Sherbet (layers of white and peach sherbet colors) and Chocolate Marshmallow (as pictured above). Each kit contains enough product to make 6 jars. Priced at $39, you can make these body butter scrubs for $6.50 each AND have the privilege of saying it's handmade.

Kit includes:

  • (6) Jars/with lids
  • 10 labels (we include extra...just in case). Label includes ingredient listing to meet FDA guidelines.
  • Body butter whip
  • Fragrance (either Roasted Marshmallow or Orange Sherbet)
  • Colorant
  • Sea Salts
  • Glycerin
  • Sugar
  • ....and of course, instructions!

All you need is a mixing bowl, microwave, and hand-held mixer!

Wednesday, November 24, 2010

What Soap Molds Stack Up As the Best? MOLD MARKET!


Yes, we may be prejudice, but in our opinion, the Mold Market brand of soap molds stack up as the best! Their 4 mil plastic is durable, the mold designs are innovative and creative, and the quality is hard to beat. This new design is just one of the many reasons our customers give accolades to the inventive designs that are introduced every 3-4 months.


Just look at the border edge detail. The leaf impression is incredible and lends itself to a "stamped" bar look. Very natural and organic looking. This new 2.5 ounce Grape Fern Leaf guest bar is one of my personal favorites. Think this was an easy design to create? Think again. The border edge alone was more complicated than you care to know. Mold Market has one of the best designers in the industry and it shows! GoPlanet is delighted to stock these molds and we think you will be delighted with the quality.

Our girl Sophie was home from college this weekend and was kind enough to pour these soaps in some "earthy" soap colors. Very nice, Soph!


Signing Off for the Holiday...

Dear FB Friends, Blogger Friends, and wonderful customers,

I'm signing off for the the holiday weekend. I'm pooped! Literally exhausted and need this weekend to regroup. My staff is finishing up orders and shipments before our Thanksgiving closure. We will be back full force on Monday. May you all have a wonderful and safe Thanksgiving weekend. I'm off to my Mom's tomorrow and then heading to the west side of the state to spend time with my husband's family.

A big "gobble, gobble, gobble" to my Turkey loving friends. For my vegan friends (including my honey-man!) a big "gobble the mashed taters and tofu turkey".

What's Up This Year with the Elves?

So.... what are Santa's Magic Elves up to this year? Thankfully, my oldest grandson (who is 7) does not follow my blog. If he did, he would be disappointed to know that his NeeNee is the wand behind the elf magic.

Last year the elves got themselves into a heap of trouble. This year, we're down playing the mischief acts and incorporating some new ideas. You might wonder what all this has to do with soap making. The answer is NOTHING! Believe it or not, I do have a life apart from my business. There are also a good number of blog "followers" that have incorporated the Magic Elf idea into their own Christmas tradition. This post is for them and for the kid in each of us.


Here are this year's Elfcapades:

  • December 10: Elves arrive by sleigh, but will be parachuting in due to unforeseen landing issues.
  • December 11: Kids decorate their Elf mailboxes. The Elves will be in a basket hanging from a self-made zip line. Won't the grand kids be surprised when they awaken to find a zip line strung from one room to the next?
  • December 12: I am putting $5 inside small zippered stockings along with a note that the Elves want the kids to shop for a gift for the local Angel Tree.
  • December 13: The Elves will be decorating the house with tinsel in all the unusual places. There will also be letters in the Elf mailboxes for each kid. They will be printed in "mirror-image" and the kids will have to use a mirror to read the message.
  • December 14: I purchased small fishing poles for each elf. The kids will find them fishing in a goldfish bowl (yes, live goldfish... and I did check with Mommy to be sure this was OK!). There will be goldfish crackers and some magic Elf dust scattered around. The magic Elf dust is what made the cracker goldfish turn into "real" goldfish".
  • December 15: Grand kids come for the night. Those little mischievous Elves will have a ladder in the middle of the great room. It will be strung with giant lights and assorted Christmas decorations. I guess the Elves thought we needed to do a little more decorating!
  • December 16: I purchased an Elf Hat and Elf Shoe Covers. Those darn Elves will put them on Daddy while he is sound asleep. Just wait until Daddy wakes up and walks to breakfast dressed in Elf attire.
  • December 17: The kids will awake to the Elves unloading the dishwasher. After all, it's all about helping Mommy and scoring points with Santa. Inside the dishwasher is a new Christmas DVD to watch as a family.
  • December 18: The elves have snow globe nightlights. All the stuffed animals and action characters will be lined up in front of the nightlights while the elves read them "Frosty the Snowman" book. Mommy and Daddy can read the book at bed time later that night.
  • December 19: Nothing like an Elf snowball fight with cotton balls. A little bit of spray snow to add effect. Guess the Elves are missing the cold North Pole Winter.
  • December 20: Elf antlers (for the boys), jingle bell tutu (for my grand daughter)... ballerina shoes.... what in the heck were those Elves doing last night? The kids will enjoy the light up head bopper antlers and Miss O will love the jingle tutu.
  • December 21: Oh no, the toilet outlined in Christmas lights... toothpaste squirted on the bathroom counter in the shape of a Christmas... new toothbrushes....
  • December 22: Elves roasting marshmallows over the fireplace... really! Camp chairs, marshmallows, open bag of chocolate bars and graham crackers. Guess the Elves needed a little midnight snack.
  • December 23: Can you believe those Elves have decorated the windows with snow spray and that there are candy canes leading to an early Christmas gift outside? I wonder what it is?
  • December 24: Tonight the Elves must prepare for their North Pole departure. Passports in hand and tucked safely inside their sleigh beneath the Christmas tree, they must bid farewell. But not before leaving a special message inside their Elf mailbox to each grand child about the real meaning of Christmas... the birth of Jesus.

Melt & Pour Soap Making: Soap Gelato Recipe #2

I'm a bit behind in posting this recipe and I apologize. I have had a number of emails asking for the Gelato Recipe #2. This recipe omits the citric acid (which gives the Recipe #1 some fizzing action in the tub).

Recipe #2 is more of a body butter soap. You are going to want to let this recipe set up for a while before you scoop into your gelato cup. If you try to scoop too soon, you may find the mixture too soft and you'll end up with a Gelato Glob. That's not exactly the visual effect you are hoping for. However, don't let it set up to the point that it is firm. Then you will have on heck of a time trying to make your soap scoops. Once the soap scoops sets up, they will be firm and when used, the scoop will be like a ball of soap. There is no fizzy or foaming action.


RECIPE #2
(all of these items are available on our web site, including the Gelato containers)

  • One pound body butter whip

  • 1 pounds of opaque (white) melted soap base

  • 2 tablespoons vegetable glycerin Start with 2 tablespoons, but you can add an additional tablespoon of glycerin if your mixture seems overly pasty.

  • 1/4 cup white sugar (yep, the kind you use in your morning coffee!)

  • 3 Teaspoons of fragrance oil

  • DWP soap colorant. Add a few drops until desired color is achieved.


Place your body butter whip into a mixing bowl. A stainless steel mixing bowl is best. Using a handheld mixer, begin to whip on medium speed. Once whipped add the melted white soap base and fragrance. Incorporate the melted soap into the whipped body butter and then continue whipping on low speed adding the liquid glycerin and any colorant in the process. Slowly add the sugar , folding it into the mixture just like you would do if baking.

Let the mixture set up for a brief period (suggesting 30 to 45 minutes) before you start scooping. Do a test scoop to see if the mixture is firm but still somewhat pliable. A squirt of Pam inside the ice cream scoop can help with release issues. Sometimes the mixture gets a bit stubborn and doesn't want to release. If you don't have Pam on hand, just rub the inside of the scoop with a very thin layer of vegetable cooking oil.

That's pretty much it. Scoop the mixture into your gelato cups. You can do one scoop or two. Remember, this recipe is type of soap scrub. It is for cleansing and not for making fizzing bath water. Enjoy!

PS: Check out the wooden spoons we sell for the gelato cups. A nice finishing touch to your handiwork. We place the wooden spoon lengthwise into the soap scoops and the secure the gelato lid to the cup.


Friday, November 19, 2010

Mold Market's S'more Soap Mold Scores a 10!

A couple of my workers came in after hours last night in preparation for our upcoming Ladies Soap Night Out. It's an annual event that I host the first week of December. The number of attendees is limited so it has become a coveted event. This year, I was anxiously awaiting the arrival of Mold Market's new S'more soap mold. It arrived on Wednesday, and I was not disappointed!

  • Pour the graham cracker part using 2 parts clear to 1/2 part white soap base.

  • Add a small amount of Yellow Oxide liquid gel to the melted soap. If you happen to overcolor, you can add a small amount of Snow White liquid gel colorant or add more white soap base.

  • Pour into the graham cracker mold cavities.

  • To make the chocolate centers, use clear soap. Add chocolate brown liquid gel color until you get the chocolate color to look realistic. You really won't need much. These mold cavities are less than one ounce, so keep that in mind when you are preparing and melting your soap base.

  • Pour the chocolate color in the mold cavity.

  • While your S'more pieces are setting up in the mold, begin preparing the marshmallow center. You will need whipped body butter, some melted white soap and liquid glycerin. How much you whip up will depend on how many S'more soaps you are making. We were able to make marshmallow centers for about 6-8 soaps with the following recipe below. Whipped the body butter in a large mixing bowl using a hand held mixer. Gradually add the melted soap base and vegetable glycerin.

One pound body butter whip

1.2 pounds opaque (white) melt and pour soap base

2 Tablespoons vegetable glycerin

  • Reserve a little bit of the white melted soap base (about 1/2 to 1 ounce). Leave it in a microwaveable dish. I like to use glass measuring cups for melting my soap base.

  • Once your graham crackers pieces are firmly set-up, remove from the mold. To assemble your S'more place one graham cracker face down and apply a small amount of white soap to the surface of the soap. This will be used to help seat the chocolate piece. Now place the chocolate piece on top of the graham cracker.

  • Drizzle some more melted soap base onto the chocolate piece and the add a "blob" of the marshmallow using a small spatula or spoon.

  • The final layer is the graham cracker bottom. Drizzle a bit more melted soap onto the marshmallow filling, then seat the graham cracker bottom.

  • As a finishing touch, we added a smidgen of cinnamon.

You can scent your S'more if you wish. For the chocolate centers, we used Chocolate scent with just a tad of cinnamon bun. The grahams crackers and marshmallow centers were scented with Roasted Marshmallow scent.


If You Do Nothing Else Today, Watch This

As we approach the holiday season, let us not forget our troops. If you know of someone serving, I plead with you to do something extra special for that person, or their family. It could be as simple as sending a Christmas card overseas, or giving monetarily or of your time to the family of our service men and women. Never forget that the freedoms you now enjoy are at a cost. A very precious cost... the lifes of sons, daughters, dads, moms... the lifes of our fighting soldiers.

Tuesday, November 16, 2010

It's Magic Elf Time Again, Register to Win

Register to Win Magic Santa Elves For those faithful followers of my blog, you will remember that last year I posted about the Magic Santa Elves. They arrived by sleigh for each of my grand kids and stayed until Christmas Eve. Their job is to monitor the behavior of the grand kids and report back to Santa. This year the Elves will be arriving on December 10. Elves are not the best sleigh drivers so this year Santa is dispatching the elves with parachutes... just in case. And, of course, there will be a just in case incident.

I plan to have the elves hanging from parachutes in tree branches or in the grand kids play house. Poppy and I will be making the parachutes from garbage bags and string. A wrapped package will be nearby (along with the elf sleigh). Inside the wrapped gift will be Elf Mailboxes, Elf Passports and this year's Santa letter. The Elf mailboxes are new this year and are one of my wild ideas for the grand kids to communicate with Santa via Elf Mail.

Magic Elves: Register to Win
Inside each mailbox is an "Elf Report" Folder which will allow the Magic Elves to take notes on the grand kids naughty or nice behavior and report to Santa. There is even a mailbox that's coming special delivery from the North Pole to NeeNee and Poppy's house. We must have an Elf Mailbox at our house for when the kids come to stay. The kids can also use the mailboxes to send messages to Santa.

You really must read last year's elf events (open link and scroll down the page to read all of their elfcapades) to understand how this all works. If you've not done this with your young children or grand kids... YOU MUST! It's fun and a tradition they will remember forever.

Tomorrow I will be posting some of the Elfcapades that will be happening this year. In the meantime.......REGISTER TO WIN A BOY AND GIRL ELF. GoPlanetEarth is giving away two elves for you to begin your own family tradition. The drawing will be held Thanksgiving day and the Magic Elves will ship out November 29. Sorry, but we are only shipping within the USA.

Here is how the FREE drawing works:

Place an order of $100 or more in product between November 16, 8 PM ET and November 24, midnight ET. Key the words MAGIC ELF in the comment section during checkout. Your name will be entered in the November 25 drawing. YOU MUST key MAGIC ELF to be eligible. There are no exceptions, so please don't ask for one.

Sunday, November 14, 2010

Feeling Unsuccessful? Watch This Video

Thank you Donna Maria from the Indie Beauty Network for sharing this video with the soaping community. I am passing it along so that my customers can see and BELIEVE that we are all more successful that we realize. We are a very blessed Nation and each of us need to grab ahold of that truth and appreciate the many blessings we so often take for granted. My prayer for you today:

May the LORD bless you and keep you;
may the LORD make his face shine on you and be gracious to you;
and may the LORD turn his face toward you and give you peace.”’


Saturday, November 13, 2010

Customer Service: It's All In the Eyes of The Receiver

FACT: Customers behave and react to their needs and expectations when placing an online order. Sadly, as retailers, we don't know the needs and expectations of each and every customer. It is safe to assume that customer will expect "bare-bones" customer service such as shipping an order timely, or responding to an email about a product. But, how a customer reacts and behaves to order errors is hard to predict. Some are just plain "ugly" and unforgiving. And, then, there are customers like this. Here is an email I received this morning:


Hello,

What wonderful speedy service, however one item must have jumped right out of the box on you! I did not get the Water dissolving paper, 3 sheets ordered. None in the box. :-(

Hope you have a wonderful weekend, thanks for the vanilla and fudge brownie sniffies. They are great!

Blessings,
Carol


Wow, an email like that is refreshing. One of my staffers messed up, but here is a customer who throws in a twist of humor. Here was my reply....


Hi Carol,

You are so right... the paper did jump right out of the box and right back into the packing bin! Imagine that, I believe a little elf was up to some mischief. The paper was sent out yesterday by first class mail (large envelope). One of my workers found it in a packing bin the next morning. Big oopsie!

Thank you for your kindness and fun nature in addressing the missing item. It's very refreshing on our end.

Kindest Regards,
Denise M.


THE POINT: Customer Service is in the eyes of the receiver. Another customer may have reacted differently. As business owners, we should offer top-notch service and strive to be error free as humanly possible. Sadly, none of us can predict how any given customer is going to respond when service or an order error fails to meet their expectations. Our company is diligent about fulfilling orders and responding to service requests. Yet, there will be those times when our best isn't good enough based on the eyes of the receiver. When those times happen (and they will), I will remember customers like Carol.

Enjoy your weekend!

Thursday, November 11, 2010

Mold Market Introduces 9 New Soap Mold Designs

Mold Market has released 9 new soap mold designs that are sure to please the heart of many soapers. They range in style from classic, to kids, to just plain fun (as in their s'more mold!). They include a pebble rock mold (pictured above) and a plum leaf (shown below).
As always, Mold Market pushes it to the cutting edge in mold designs and the grape fern with border (shown below) is a perfect example. In a future blog post, I will have to talk about what it takes to create one these mold designs. It's not as easy and straight-forward as you may believe it to be.


You can check out the 9 mold designs here. Other new designs include a S'more mold (based on pre-orders, an expected sell out). There is Homer the Fish, Whale Willie, Assorted Easter Eggs, Oblong Leaf, and a Tic Tac Toe mold.

Mold Market is one of the leading soap mold companies in the US. They are a strong supporter and sponsor of the Handcrafted Soap Makers Guild year after year. Quality follows their name. You won't be disappointed with their mold line AND all molds are made in the USA!! I know ya' all are jumping up and down about silicone molds these days. But, 99% of silicone molds from are NOT made in the USA. They are manufactured in Mexico, China, or other countries that are not supporting the US economy and our workers. Go ahead and shoot me now (I know I'm going to get email feedback on that one), but I have to call it like it is.

Tuesday, November 09, 2010

Soap Making Recipe: Fortune Cookie Soaps

As promised, here is the recipe used for our fortune cookie soaps that will be featured at the annual "Girls Night Out" holiday soap making event sponsored by GoPlanetEarth. Below is the recipe we will be using.

  • 12 ounces FLEX white soap base
  • 2 teaspoons water
  • 1/2 teaspoon glycerin
  • 3 teaspoon fragrance oil (you may use less depending on the fragrance type)
  • few drops of Leaf Brown color (we wanted a creamy looking base so the leaf brown took the edge off the sharpness of the white base)

A thin layer of the melted, scented and colored soap base was poured into either the 8 or 9 inch silicone jelly roll mold. Once the soap set up (about 10 minutes depending on the pouring temp) we use a 3 1/4" round cutter to stamp out the circles.

I found this recipe to work very well as long as you keep a eye on the poured soap. You will want to release as soon as the soap is firm enough to not show "crinkles" when removing from the mold. Immediately stamp out the circle area, fold in half gently squeezing the edges together. I used my finger to place an indent in the center of the soap and then folded into the fortune cookie shape. You need to work fast. The soap needs to remain pliable when making the fortune cookie folds.

Here is a great link for printing fortune sayings to place inside your soap cookies.

Good luck!!

Holiday Decorating: Business Shout Out

One of my most favorite online stores is CB2. They have some of the most hip house and kitchen ware items ever!! This is just one of the clever holiday decorating items offered on their blog. Easy and actually quite inexpensive.


Just think of all the ornament types you can hang from the sprayed tree branch. I have a big floating island in the lower level of my home. It seats up to 10 people. I am going to spray a branch in the same silver as shown and then drape ornaments from the branch to match my table decor (might even hang some soaps as hostess gifts). Oh, what fun. I can't wait to see how it all turns out. My honey man and I host a number of dinner parties during the holiday season. This idea will allow me to switch up the table decor to fit the event.

Sunday, November 07, 2010

Melt and Pour Soap Making: Fortune Cookie Soaps

This weekend I've been working on Christmas gifts. One of those gifts included fortune cookie soaps. I'll have a tutorial posted on the web site soon, but here is a sneak peek at the soap cookies. My annual "Ladies Night Out" soaping event is coming up soon, and this will be one of the featured projects.

I'll be making a number of different fortune cookie types, but this first go around was a cinnamon chocolate scent drizzled with both chocolate and vanilla colored goodness.


I had a dinner party to attend the same day I made these soaps and needed to bring a hostess gift. I quickly packaged the finished soaps to hand out at "treats" to the guests and then put together a Chinese take-out gift box for the hostess. I packaged two cookie soaps in each glassine bag and then printed up labels to seal the bag. Ribbon was applied to the outside of each bag using double sided tape. The final presentation was quite impressive.


A printed fortune was placed inside each cookie. The trick to this project is having the soap base the precise consistency to fold and bend each cookie into its shape. And yes, there were plenty of blunders when doing this project. The good news... the iced topping helped to cover those blunders. I'm off now to do another batch to ensure that the recipe I post is accurate! Wish me luck.

Saturday, November 06, 2010

Soap Dishes: The Finale

My friend, Peg was kind enough to share her finshed artwork with me. I have been blogging about how to make hand-casted soap dishes using leaves. This particular piece of art goes a step beyond. This large bowl was hand-casted in concrete using "layers" of giant leaves (found in your garden or yard). You can make this same type of art using the recipe given in a prior post. Isn't Peg's paint job awesome?


Imagine the joy of receiving this casted bowl at Christmas filled with bath products and assorted soaps. It can also be used to hold fragrant potpourri, cinnamon scented pine cones, fruit or whatever else strikes your fancy. I sure hope I'm on Peg's Christmas list this year (hint, hint!!).

Friday, November 05, 2010

Ten tips for Shedding Hats in Your Business Life


This is a copy of a recent article I have written. It was published in the Handcrafted Soap Making Guild, "The Journal", magazine. Hope you find it helpful (especially during this hectic holiday season)!

Many small business owners are hat collectors? Is that you? Ten tips for Shedding Hats in Your Business Life


How many hats are you wearing and what roles are you juggling in your business life? It’s a question many of us ponder especially those running a 24/7 online business. Even with the help of employees, business owners find themselves working long hours; sometimes six days a week (maybe even seven). And let’s not forget all those social media hats that online companies must now wear to stay on top of their game. At the end of the day, all those multi-layered hats can siphon our energy and cause us to operate in crisis mode. If you find that you are wearing too may hats, and experiencing a human energy crisis due to it, then it’s time to reevaluate your hat collection. It’s time for a human energy hat assessment. Let’s take a look at ten ways you can shed, discard or reassign hats to help empower you and keep you from being stretched like a rubber band.

1) Don’t let one single hat define you. Realize that you, and only you, have choices about your life. You decide how you will live your life, how you will respond to a crisis, and what you will allow to drain your energy. Prioritize your hats. Don’t let the hats make your choices.

2) Know when to shred a hat and move on. Determine how much energy you want to spend on a given issue. If you find you are expending too much energy, then remind yourself that this is all the energy you have for the moment and “let it go”. Take off the hat.

3) When faced with perplexing decisions or issues, take off the hat, and sleep on it. Always step back from the moment. Ask yourself “How important is this in the grand scheme of life?” You’ll be amazed at how much easier it is to see the big picture when you remove the hat overnight.

4) Have a combat hat on hand. Put on your combat hat whenever you need to enable detachment skills and handle confrontational situations. Example: If you’re wearing the hat of a customer service representative, you may need to switch to the combat hat from time to time. The customer service hat is service with a smile. The combat hat deflects negative energy of that occasional unhappy customer (and we all have them). So wear that combat helmet whenever necessary and protect your precious energy. Remember, emotions are energy driven and negative customer issues can zap your energy.

5) We can’t always control the fit, design or weight of our hats. Some fit, look and feel better than others. That’s OK. Life is full of all kinds, shapes, sizes and styles of hats. But in the end, you should only be wearing those hats that feel the most comfortable. You might be surprised at how many ill-fitting hats you can give away if you just ask.

6) There is no prize for wearing the most hats. Occasionally, you need to park those hats on a hat rack and discard those that don’t fit. If you don’t take stock of your many hats, you’re going to burn out physically, emotionally and mentally. Every time you say yes to a new hat, then delegate or discard a former hat.

7) Every 4-6 weeks remove all of your hats. Take a complete break from every business hat you wear and defrag your head. Shut down the computer; turn off your email and cell phone. You will be amazed at how life goes on (and your business as well) even when you aren’t wearing hats for a few days.

8) Occasionally, lift the brim of your hat. It could be obscuring your vision. If you lift the brim, you just might just discover that what you thought was important, is not. Wear the hats you love the most and then giveaway those hats that might better fit someone else.

9) Identify your core hat. Don’t spread yourself so thin that you are losing sight of your business mission. Assess and then refocus your activities on those things that bring the greatest sales within your marketplace. Determine the heart and soul of your business operation and downsize if necessary. Take off a hat or two.

10) Know when it is time to pass a hat on to additional staff. Labor is usually one of the more costly expense items in the budget, but, skimping on staff can impede the growth of a company. Don’t become a slave to your company. Many individuals start their own business to have more control over their time. But, while trying to grow the business, they become enslaved to the very thing they thought would afford them more freedom. They haven’t learned when it’s time to pass the hat.

Whether you are shedding a hat, giving it away, or retiring it to the garbage bin, here is the bottom line: Only wear those hats that help you stay on target with your business goals. If it means downsizing your product line, then do it. Maybe you are trying to target too many audiences. If that is the case, scale down and refocus your business plan to target a single audience. Scaling down your hat collection doesn’t represent failure. It simply means you have learned how to stop trading time for money. The mark of any good small business is embracing the goals of the business, not how many hats you can collect.

Thursday, November 04, 2010

Pay It Forward: Working With Your Community

On Wednesday evening my local Bunco group hosted a fundraiser for our community Angel Tree. The money helps needy families within our community to have a Christmas. With Michigan's poor economy and major job losses within the automotive industry, families are losing homes and barely able to feed or clothe their families much less purchase gifts for beneath the tree.

These are not individuals who are lazy, don't want to work, or are trying to "milk" the systems. The needy in our community have held affluent, well paying jobs, perhaps farmed the soil, worked at automotive assembly plants, or at small businesses within our community. Bottom line: They have lost their jobs and many are facing foreclosure. For the first time in their hard-working life, they are feeling hopeless.

For those of us still fortunate to be employed there is an obligation owed to those that have happened upon hard times. It's a time to rally and pull together as a community to help those in need. As Christmas approaches, there is no greater time to do just that. It's a time to pay it forward. A time to share with others the blessings that we have to offer.

I hope that each of you take a moment to consider how you might help someone within your community who is suffering hardship. Something as simple as a gift card for gas, prepaying a child's school lunches, purchasing an extra gift to donate to your community "Angel Tree", or even a donating time to a shelter. Pay it forward. It's a principle of life and it works every time. "You reap what you sow." My Dad was a pastor and taught me that principle early in life. "Give and it shall be given back to you." I've never been disappointed.