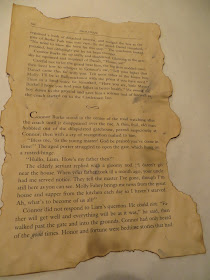
 I don't know about you, but I can't get past the price of a store-bought card. Why pay $3 to $5 for a card when I can make my own? Not only can I make it, I can personalize it any way I please. So with Mother's Day rapidly approaching, I'm in card making mode.
Retro and vintage items still seem to be in vogue, so I opted for the latter, a vintage look. The card making process will be posted in steps with this being step one; how to make paper look old. It's easier than you might think.
Step 1
Tear out pages from an old book. Shop thrift stores and garage sales. Look for books in various sizes with interesting text and pictures.
Step 2
Heat the oven up to 200 degrees while drinking a morning cup of black coffee. Reserve a portion of the coffee for this project (at least that's what I did :))
Step 3
Place paper pages on a cookie sheet. Pour the reserved coffee over the pages. A quarter cup will probably do; you want the pages covered but not totally drenched. Make sure the entire page is covered with the coffee. Let pages set for a few minute to soak up the coffee, then pour off any extra coffee liquid from the pan.
Step 4
Place cookie sheet in oven and let the paper heat through until nearly dry. About 5-7 minutes. Remove before the edges start curling.
Step 5
 Scoop out a few grounds from the brewed coffee filter. Using your fingertips rub the grounds onto the baked paper. Shake off excess grounds over the sink or onto the cookie pan.
Step 6
While the paper is still moist, gently tear some of the edges to add to the aged look. Burning the edges of the paper slightly with a lighter also lends authenticity to the vintage look.
Step 7
Place paper on paper towel to fully dry. Place a couple of books or magazines on top of the paper to keep the pages from curling while drying.


Now that the vintage paper is prepared, I can begin working on my vintage cards. I'm still kicking around ideas but will definitely be sharing the end results.
I tested how the page would feed through a laser printer. Worked like a charm. I think I will be using this technique often.


No comments:
Post a Comment
Thank you for your feedback!Comments are moderated before posting. Once approved, the comment will be posted.