Sunday, January 24, 2010

Melt & Pour Soap Making: Last Minute Valentine Cupcake Soaps

Looking for some last minute Valentine soap ideas? These cupcake soaps were made in no time flat using the base of the Mold Market Cupcake Mold. We added our own twist for the topper.


The above cupcake base was poured in clear soap base and Flower Child Rock Me Raspberry colorant was added. Our scent choice was Hugs & Kisses (very yummy!) It was topped off with a tuff of whipped soap frosting and a pink colored deep heart. A pinch of white sparkle glitter added a bit of cupcake glitz.


Above: An eggshell colored base (1 drop DWP eggshell color added to white soap base). Next we added a white-colored round cut-out, a chocolate heart, a tuff of whipped soap frosting, and a deep heart colored red. A pinch of red glitter was sprinkled over the finished soap.


Who doesn't like chocolate and cream? We made this cupcake soap using our Milk & Cookies scent.


Layered hearts, and more layered hearts. Use the Mold Market cupcake base to stack different sized hearts. We added glitter to the some of the hearts (we added to the melted soap). A few candied hearts on top add a "sweet" touch.

All of these soaps fit our cupcake boxes. I'll be posting a tutorial soon.


Saturday, January 23, 2010

My Mom: The Horrible Effects of Cancer

Those who follow my blog know that I lost my Dad to Cancer in September of 2008. I watched the devastating effects of prostate and bone cancer cripple a man full of strength and vigor. I now watch as my precious Mom endures the effects of this disease. This week, she had cancer removed from her nose (this is the 4th recurrence). The cancer was very invasive and reconstructive surgery was necessary.

I spent all day Thursday at U of M Ann Arbor hospital while she underwent reconstructive nose surgery. The plastic surgeon was amazing. Even though this picture looks pretty frightening, the end results will be incredible. They have rebuilt the cartilage and bone in the nose and grafted skin from the forhead to sculpt a new nose.

In another 3 weeks they will trim away the skin at the bridge of her nose and, believe it or not, she will begin to heal and look normal. I have posted this picture as an example of the heartache that so many individuals are going through with this terrible disease. My Mom is 79 years old and it breaks my heart to see her in this state.

There are some who may find this post offensive. I don't apologize. This is real life and cancer is ugly. I hope it prompts you to join the fight against this killer disease. I will be posting the final results of my Mom's reconstructive surgery once she heals (in about 4 weeks).

For those of you suffering from cancer, my prayers are with you. For those wanting to help fight this disease, plan to participate in the 2010 Relay for Life event.


Monday, January 18, 2010

More Designer Soap Fun with GPE Paper

More printable soap fun using our GPE paper.


Watch our FREE tutorial and learn how to make these snazzy looking melt & pour soaps. These are some of the latest designs done by our staff using the GPE printable soap paper. It's sooo easy. All you need is colorful artwork and a printer (we offer the paper in both ink jet and laser). Think of all the neat Valentine soaps you can make!

You can purchase a printed tutorial that includes templates for several of the Mold Market basic shape molds. However, you can use many other Mold Market molds that are not included in the printed tutorial (such as the plain heart) by tracing the shape of the mold cavity onto plain paper. Cut out the traced shape and use as a template when printing your artwork onto the GPE paper.

Soap of Many Colors Tutorial Now Online


As promised, the new "Soap of Many Colors" tutorial is now online. You can view this FREE tutorial below or on our website. You can also purchase this project as a printed PDF tutorial.

Update on Corrugated Eavestrough Aloe Vera CP Soap

For those following my blog, you will remember my post about the corrugated eavestrough mold. For those of you just coming aboard, check out the first post here. Dawn graciously forwarded some photos of her finished soap using this mold.


Dawn told me that the first three CP soap batches went great in the mold. However, the fourth batch wasn't without problems. It seems the soap got too hot and melted one end of the mold. Dawn's suggestion: DO NOT wrap the raw soap in a blanket or towel if using the vinyl eavestroughing.


Dawn is going to make her next batch of soap in a metal eavestrough. She promised to keep me posted, so I'll be sharing her results in a later post. I still haven't forgotten my promise to try melt and pour soap in this mold. I'm hoping to whip up a soap batch this week.

Saturday, January 09, 2010

Melt & Pour Soap Making: Miss O Princess Heart Soaps

A few posts back I showed pics of the Miss O Princess Soapsicles. Here is a follow-up that shows the coordinating Miss O Heart soaps. Easy, easy, easy... AND, a great way to use up any leftover soap from the soapsicle project.


Our tutorial (shown below) will show you how to make these awesome soaps. Perfect for Valentine's Day.


Watch the FREE tutorial:

Thursday, January 07, 2010

Corrugated Eavestrough as a Soap Mold? Read on...

Some time back, I made a blog post that included the photo shown below. It was a stock photo and really had to relevance to any of the molds that we stock at GoPlanetEarth. However, one of my customer's, Dawn, was intrigued by the shape of the soap shown forefront and wanted to know what mold she should purchase to obtain that same shape. Sadly, I had no clue since it was not one of our molds, though this very shape had been on the drawing board for a Mold Market mold. Unfortunately, some thermoforming issues related to release put a snag in the preliminary design.

I did some brainstorming and suggested to Dawn that using a piece of corrugated eavestroughing might achieve a similar shape. I wasn't sure it was a viable idea, but anything is worth a try, right?


Well, Dawn grabbed ahold of the idea and gave the eavestrough idea a whirl. She was kind enough to email her results to me and graciously consented to let me share those results with you. Thank you, Dawn! Below is Dawn's email to me.

__________________________________________

"I recently wrote to ask where to find the mold for soap like in a picture on your website and you wrote to say "Maybe a rain gutter?" So I tried it with a white vinyl rain gutter ($7 for a 12 foot piece at Home Depot) cut into 12 inch length, oiled the inside lightly with olive oil and then poured Aloe Vera cold process soap into the mold.

  • First try, soap leaked all over the place, even though I meticulously taped one end shut with real sticky tape.
  • Second try I used thick plastic with tightly wound wide rubber bands.
  • Third try I used several layers of saran wrap with tightly wound wide rubber bands. The third time the soap still leaked out but did stop leaking soon without losing much soap. Then to get the soap out of the rain gutter was a problem. Today I noticed that the soap was shrinking from the sides more so I put the 12 inch piece back in the freezer for about 30 minutes. Then I laid it on it's side to thaw. A few hours later I noticed that the soap was sliding out one end! It rolled right on out! Beautiful!

So this mold is quite cheap and works great if you are patient, something I'm not!"


SIDEBAR: The soap leaked immediately when using tape... so tape DOES NOT work. So far, only saran wrap withwide ruber bands has worked. But the soap turns out so beautiful. I put the rain gutter with soap inside a flat bottomed bowl to catch any leakage, which wasn't much once I tried the saran wrap.

______________________________

If you want to try this and are looking for wide rubber bands, you can find them here. You will want to order the Size 84.

The next trip my husband makes to Home Depot (which is almost every weekend), I am going to have him purchase a 12 ft section so I can try with Melt & Pour soap. Not so sure it will release as easily as the CP since MP soap doesn't have the same shrinkage as CP soap. But what the heck! It's worth a try. I'll let you know how it works out.

Monday, January 04, 2010

Melt & Pour Soapmaking: Miss O Princess Soapsicle Tutorial

The Princess O Soapsicle tutorial is complete. You can view it below and also on our web site. A great soap for Valentine's Day. Pair it with coordinating heart shaped soaps.


Tuesday, December 29, 2009

Melt & Pour Soap Making: The Soap of Many Colors

Melt & Pour Soap Making: The soap of many colors
As a child I remember the story about Joseph and his coat of many colors. The other night while reading this favorite Bible story to my grandkids, I was inspired to create a soap of many colors. This is my take. A full tutorial will be posted on the GoPlanetEarth.com web site within the next week or two.

Melt & Pour Soap Making: The soap of many colors

Melt & Pour Soap Making: Give Hugs & Kisses on Valentines Day

Melt & Pour Valentines Hugs & Kisses Soaps Valentine's Day will be here before you know it. These easy to make "Hugs & Kisses" soaps make great gifts for teachers, friends and anyone else that wants to indulge in some good, clean soapy fun. A short tutorial is in the works, so check the "Resource Project" section of our web site within the next few days.

Melt & Pour Valentines Hugs & Kisses Soaps

Monday, December 28, 2009

Melt & Pour Soap Making: We've got your name, baby!

Melt & Pour Alphabet Soap Molds
Did you know that GoPlanetEarth carries the Mold Market Alphabet Molds? Create a colorful bag of alphabet letters. Package the letters in a cellophane bag and place inside a clear canister. Kids will love spelling out their name or words during bath time.

Melt & Pour Soap Making: Valentine Princess Soapsicles & Hearts


My granddaughter, Olivia is all about pink. She is certainly the princess in our family. This week, while enjoying some holiday down-time, I am working on a number of soap projects. I only wish I had more time for the creative side of this business. Lately, I haven't had time to even think about new projects!

This Princess-O soapsicle was designed for my sweet Olivia for Valentine's Day. She loves the girly pink and purple combo, not to mention the "Paradisus" scent is to die for. A mini tutorial is forthcoming and I'll post it after the first of year. For now, I'm trying to get my house in order for our annual New Year's Eve "surf & turf" dinner party.


Hope you're enjoying the remainder of this holiday season. It's snowing in Michigan today and I've got a fire blazing in the fireplace and hanging out in the new PJ's I got for Christmas. Oh how I love snow when I don't have to drive in it.

The infamous Miss O on Christmas Morning.
She's going to be a heartbreaker with her blue-eyes and natural
curly blonde hair. Note her new PINK car seat. She was awe-struck.

A shout out to Sissy Soap

I stumbled upon these soaps made with Mold Market molds at Sissy Soap. I am once again reminded how much I love the Mold Market brand. They have incredible detail and are durable for both CP and HP soap making. Pictured above is the Born to Ride Mold and below is the Massage Bar. You can purchase both these soaps ready-made at the Sissy Soap Esty Store.


Visit GoPlanetEarth.com to view Mold Market's comprehensive mold line.

Monday, December 21, 2009

The Elfcapades:The Eve of Day Eight


What a surprise for Fischer, Miss O, and Carson when then got into the van for school. The elves has wrapped the lunch pails like presents and had the kids' backpacks ready to go. I think they were hoping to visit the school. Mommy said the elves could be tucked in the backpacks, but she didn't want any misbehavin'!


The Elfcapades:The Eve of Day Seven

Dear me, Elf Freckles was injured on a motorcycle ride to Miss O's bedroom. He was on his way to a tea party that included the likes of Buzz Lightyear and Woody. Sadly, he didn't make the tea party as he had to stop off and bandage his wounds.


The Elfcapades:The Eve of Day Six


On the eve of day six, those elves were soooo full of mischief! It was a mess in the kid's bathroom. They had baby powder and lotion all over the place and even wrote on the mirror with Mommy's lipstick. I don't think Santa's gonna be too happy about this. But, maybe Santa will be forgiving if the elves can convince him they were only trying to make themselves pretty for the kids. Now the lipstick on the mirror might cause Santa to frown. I'm certain the elves just wanted to greet the kids with a Merry Christmas message as they got ready for school.


The Elfcapades:The Eve of Day Four

Seems the toilet paper was just a little too tempting. Thankfully the elves didn't think the toilet was a swimming hole! Could it be they are missing the North Pole? Is that why Elf Dimples was found in the freezer sipping on Baby Fischer's bottle? It's all a mystery since the Elves can't talk to humans. Did you know they immediately turn to a toy state once they hear or sense humans are near?

Elf Freckles all wrapped up in toilet tissue.

The toilet paper was wound throughout the house and was even wrapped around the Christmas tree.

The Elfcapades:The Eve of Day Two

I am certain that it was Miss O's elf, Giggles, that instigated this little elfcapade. When the kids awoke on Day Two, all three elfs had stacked canned goods to reach the kitchen counter. And why in the world would they do that? Well, they wanted to change the date on the countdown Santa. With a calender in hand, they were counting the days until Christmas so they could change the wooden "countdown" blocks.

Miss O with her Elf, Giggles.


The Elfcapades:The Eve of Their Arrival

Carson on the eve of the elves arrival. Their offical paperwork
from the North Pole is in the addressed envelope.

For those of you following the saga of the Magic Elves, this post is an update about their Elfcapades. My, oh my, these little elves have been into just about everything during their stay. I'm guessing Santa will have a few words for them when he reads the files in their Elf Report.

On the eve of their arrival the elves were busy decorating one of the small Christmas trees. They stacked boxes and books so they could reach the tree. And what to the kids' wondering eyes should appear (the next morning)? A tree decorated in undergarments the elves had been pulled out of drawers. I think the red bra really adds a splash of festive appeal.

Sunday, December 13, 2009

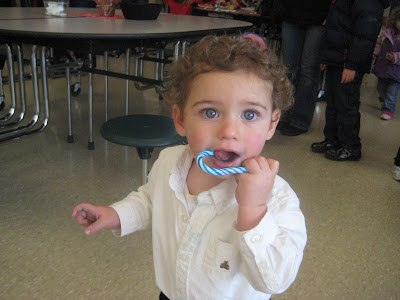
Miss O & Carson with Magic Elves

Here is a pic of Miss O & Carson the morning the elves arrived. The 3rd elf belongs to Fischer, pictured below.


Saturday, December 12, 2009

Elfcapades Countdown: The Arrival


For those of you following the journey of the Magic Elves, they have safely landed from the North Pole. At 10 am this morning I received a phone call from my six year grandson, Carson. He was excited to the max and I could barely get in a word as he explained how the elves were magic and came to life when there was no one around. He couldn't wait to go outside and play so that his elf, Freckles, could come to life.

Three year old Olivia also talked about her Elf Giggles. I'm not so sure she understands the concept, but she finds her elf adorable. For her, I think it will be more about the naughty and nice idea. She's a little spitfire, so I'm sure her mommy is hoping that Giggles will prompt some good behavior.

Since the Magic Elves can only communicate in writing, my grandson has already had mommy write a note to Elf Freckles to see if he wants to attend the Annie Musical tomorrow afternoon. I do hope Freckles responds with a YES! After the show, NeeNee (that would be me) is taking Carson for a crab dinner at Lucky's Steakhouse. Oh, how I love this season and the joys of watching a child's imagination in action. I am anxious to see what kind of mischief the elves will get into this evening while the kids are sleeping.


NOTE:

I recently ordered the book The Elf on the Shelf. When it arrived, the hard-bound book cover was upside down. If you held the book with the front cover facing you, the pages in the book are upside down. Very strange. I called the publisher and they sent a new book right away. Since I have both books, my daughter is going to incorporate this publishing error into a little elf mischief. She will first read the book with the correct cover. Then, a few nights later, she will read the book again. However, this time the book cover will be upside down and there's no one to blame but those mischievous elves! This should definitely lend authenticity to the elve's magic.

Thursday, December 10, 2009

The Secret Santa Elves Arrive by Sleigh!!

Giggles Twinklewink, Freckles Mincemeat and Dimples Tumblefluff arrive tomorrow via sleigh to my grandkids home. For those of you following my blog, you know that there are two things I love in life... SOAP and my GRANDKIDS.

The secret elves is a new tradition this year for the grandkids and it's truly been a labor of love considering my busy work schedule. My daughter is a K-8 Assistant Principal and as a Mom to a six, three, and 18 month year old, I knew she would never have time to put this whole event together. Every extra minute I've had to spare has been commited to this 14-day Secret Elf event.

Tomorrow the elves will land on the front porch of the grandkids home along with passports, naughty & nice folders, and a letter from Santa explaining their arrival. The Magic Elves will remain with the kids until Christmas Eve at which time Santa will collect them as he make his deliveries. Any mischief or acts of naughtiness will be recorded in the journals and a report will be given to Santa on who has been naughty and who has been nice. These Magic Elves will explore the house from top to bottom to make sure that everyone in the family is behaving themselves.

Of course, these Magic Elves can be very mischievous and I have a whole agenda of what will transpire. I think the kids will get a big kick out of this new holiday tradition. If you would like to see the letter I composed from Santa and the passports/naughty/nice folders I designed, please email me. I would be happy to share.

A Helpful Soap Making Tip for Adding Color

Helpful Soapmaking Color TipWhen you work with Melt and Pour soap, you typically melt the soap base, then stir in the color and fragrances. If, however, you overheat your product, the heat can negatively change the nature of the color. The most common problem is with speckling. Speckling is flecks or clumps of color that will not dissolve into the soap base and no amount of stirring will help. The above photo is a perfect example of "color speckling".

The hotter the medium, the worse the speckling. You will not know if your color is sensitive to excessive heat until you run into the problem. If you do, try working with lower temperatures. We have found that the powder pigments present the greatest potential for speckling though it can occur with certain liquid gel colors as well.

Before adding any color (gels, liquid, or powder) we suggest allowing the soap to cool down to a temperature of 140 degrees. If you can comfortably dip your pinkie finger into the melted soap, it's a good temp for adding color. GoPlanet's Neon purple and Chromium Green Oxide have been known to speckle when we have added the color at high temps. If using these colors, allow soap to cool until a thin skin of soap forms on the top. Break through the skin to add the color and stir until you no longer see any color flecks. You can then reheat the soap to a pourable temperature.

Use patience when working with colors. Keep in mind that colorants are raw materials and there can be inconsistencies with their use, i.e., speckling or dots of undispersed color. With patience and the right pouring temp you can overcome the speckling issue.

Tuesday, December 08, 2009

Happy Holidays from the GoPlanetEarth Staff

Every year my company hosts a Christmas holiday dinner for employees. In the past, the dinner has been at a restaurant. This year, my husband elected to cook dinner for all of us and Chef Carson (pictured front) was his assistance. Carson welcomed each guest, took coats, handed out holiday slippers for everyone to wear, and was in charge of Bingo Bucks. Bingo bucks is something I occasionally do at staff luncheons. Everyone gets two bingo cards and there are two winners per round. The prizes include gift cards and cash and it has proven to be a big hit. It's just one of the ways that GoPlanet tries to show appreciation to our dedicated workers.

Chef Carson


Chef Chris

Christmas is only a few weeks away. We've all been working like crazy to process orders and ship everything timely. In the midst of all this chaos, I didn't want to forget to wish each of our customers a very Merry Christmas and Happy Hanukkah. May this season bring you joy and many wonderful moments with family and friends.

Wednesday, December 02, 2009

Bath Butter Scrub Recipe

It's time again for my annunal Holiday Soap Night with the Bunco gals. Tonight we are doing 3 projects. Soap crayons for the grandkids and 2 projects for us girls... a Bath Butter Scrub and Body Butter Lotion. When you get to be middle-aged, you need all the pampering you can get.


Below is the Bath Butter Scrub recipe that we are using for Soap Night. If you would like to purchase the entire kit, you can do so on the GoPlanetEarth web site. A limited number of kits are being offered until the end of the year. You will want to order early to ensure you get one. The kit includes labels, jars, and all the ingredients needed to make (4) body butter scrubs. The only thing not included is the sugar which is readily available from your pantry or a local grocer. There are two fragrance choices offered with the kit: Japanese Cherry Blossom (makes a pink color body scrub) and Olive Asian Tapenade (makes a yellow color body scrub as shown below).


The finished product is perfect for gift-giving. This type of scrub sells for up to $30 a jar. Make your own for a fraction of the cost!


RECIPE:

Fills two 8-ounce jars

Whip the bath butter with electric mixer unitl it begins to get smooth. Then add the glycerin, color and sugar. Continue mixing until light and fluffy. Fold in the medium coarse sea salt and fragrance. Spoon mixture into jar.

NOTE: If you find it difficult to get the mixture into the jar, do the following:

Scoop all of the mixture from the mixing bowl into a 4-cup microwaveable dish. A glass measuring cup works well. Set microwave on medium heat and heat the mixture for 3 minutes, remove and stir gently. Place back in the microwave for another 1 to 2 minutes. DO NOT OVERHEAT. Every microwave heats differently, so keep your eye on the mixture. You just want the mixture soft enough to pour into the jar.