Showing posts with label Beyond Soap. Show all posts

Tuesday, December 16, 2014

NEW PRODUCT: Mold Market Chalk Paint


There are plenty of changes and new in the works at our parent company, Nouveau Designs LLC. Recently, we set up a fulfillment center in Spokane, Washington which is where Mold Market brand molds are manufactured. This means most orders ship the same day as received. That's a big plus in our minds.

Now that the hectic move is over, we are concentrating on our new line of chalk paints. We are in the process of testing, testing and then more testing. The results are exceptional and we plan to launch this new product within the next two weeks.

If you are not familiar with chalk paints, let me share with you what this amazing product can do.

  • This non-carcinogenic paint covers everything, no kidding! It can be use on glass, metal, wood, leather, Formica, concrete and even fabric.
  • With this paint, you can literally start and finish a piece of furniture within a day.
  • No prep work (like sanding) is required.
  • Paint colors can be layered to achieve a distressed look (shabby chic) to your project.
  • 28 colors available
  • Colors can be blended to create a custom color
  • One pint of paint will easily cover up to 50 square feet. If you think in the terms of furniture, that's two dressers.
  • Water-based, so it cleans up easily with water.

The possibilities of this chalk paint are endless. In January 2015 we will introduce a new product line to use with our Mold Market chalk paint. However, 'HUSH' is the word for now.

A one-pint container of Mold Market Chalk Paint retails for $22.95 and a 4-ounce jar retails at $9.95.

We will also offer a line of Metallic Dusting Powders to enhance the finished look of your chalk painted projects.


Take a look at some of the furniture and projects we have done with these awesome paints. 


Sunday, December 14, 2014

Vintage Doily Window Ornaments: Part 2


A few days ago I posted on how to snowflake window ornaments from crocheted doilies. Here are a few of the finished results. My granddaughter, Olivia, and two of her friends had a great time sprinkling the glitter on the doilies. Of course, the island counter in the kitchen was one sticky mess.

A spray adhesive was used to apply the glitter. The technique was more like spray, sprinkle and shake. The excess glitter was collected off the craft trays for a future project.


My personal taste leaned more toward white sparkle and iridescent shred glitters, but the girls were all about pink and purple. No matter the color of glitter used, they were all beautiful. Each of the girls took home two snowflake doilies to hang in the bedroom window.


Saturday, December 13, 2014

Picture Frame Christmas Decor


This easy holiday decor was made from a thrift store picture frame, minus the cracked glass, and and miscellaneous ornaments. Ribbon remnants were used to string the ornaments to the back of the frame. For ease, I used a general purpose staple gun to hold the ribbon-strung ornaments to the back-side of the frame.


The original color of the frame was silver, but I painted it red and then sanded areas of the frame to allow the under-layer of silver to show through.

This holiday frame has so many possibilities. You can hang on the wall or place on a shelf unit. A over the door hanger is another option (the kind you use to hang a door wreath).

The glass could have left in the frame and a window rub-off applique applied beneath the Christmas bulbs, i.e., Happy Holidays or Merry Christmas.

An affordable handmade gift for the holidays.

Friday, December 12, 2014

Vintage Doily Snowflakes

I am always in search of new craft ideas to do with the grandkids. Last night we mixed glue and water to make a DIY fabric stiffener for these doilies that will be used to hang in windows for the holidays.

My five-year old grandson got a bit carried away with the dipping process and we may have to let his doilies dry for another night.

Tonight, we will be using glitter spray on the snowflake doilies and then hanging them from the sliding glass doors using suction cup holders. The kids are excited and I will post the final glittered snowflakes tomorrow.

Hobby Lobby sells doilies in 12-packs at a reasonable price, or check out Ebay. Here is what you will need for this project.


  • 50:50 ration of white glue to water. Mix well in an large mixing bowl until the consistency of milk.
  • Cloth doilies
  • Plastic garbage bag for laying out the doilies after they are immersed in the stiffener
  • Spray glitter product (or you can spray the dried doilies with adhesive glue spray and sprinkle with glitter
  • Suction cup window hangers
  • Invisible thread for hanging the snowflakes


Submerge each doily into the glue mixture until fully saturated. Gently squeeze away any excess liquid and lay the doily flat on the plastic garbage bag.


Allow the doilies to air dry overnight. If they still appear to be damp, let them set out until completely stiff and there is no sign of moisture.


Gently lift the doilies from the plastic bag and flip them over to allow air to completely circulate to both the front and back sides of the fabric. You can either hang the doily snowflakes as is, or add sparkle by applying iridescent glitter to each side. (see my Part 2 post for using glitter).

The stiffened doilies also look nice inside a picture frame. Remove the frame's glass and cut and cover a piece of cardboard to fit the frame opening. Burlap material works well, or use brown Kraft paper or scrapbook paper. Hot glue the doilies in place.

Thursday, December 11, 2014

Vintage Baby Shoe Photo Gift


This is one of the many holiday gifts that I am giving to family this Christmas season. I purchased two vintage baby walking shoes from a local thrift store (bells included). To give added weight to each shoe, I poured plaster Paris into a zip lock bag and tucked into the shoe. The plaster was still wet so it formed to the shape of the shoe.

Thrift store doily finds were tucked inside the shoe and hot glued in place. The photos are held in place by silver place card holders I had left over from a wedding event. A small pine and berries were seated in place with hot glue.


Decorative scrapbook punches can be used to dress up the photo backing. To add to the vintage flair, I place satin ribbon just below the shoe tongue. The doily behind the picture was Mod-Podged to make it stiff (lay it flat for 24 hours to stiffen) and then glued to the picture back.

These cute keepsake frames look adorable on a fireplace mantel or bookcase.

Friday, June 20, 2014

DIY Friendship Plaque


I've been on a crafting frenzy since I returned from Spokane. This is my latest project and I am pleased with the results. The layout was the most time consuming.

The canvas board was left-over from my granddaughter's birthday. It was painted in rainbow covers, but it didn't matter since I was going to cover the canvas with various papers.

The paper shown to the left was printed on the computer, but other papers used were scrapbook papers or handmade.

Paper punches were used to create decorative edges and satin ribbon was added for embellishment.


Mod Podge was used as the glue and sealer for this project. A thin coat was applied to the canvas and also to the back of each paper. A sponge brush works best for the application process.

I took a picture of the layout before applying the Mod Podge and used it as a reference when positioning the pieces. The lettering was printed on handmade paper and trimmed to fit.

The colors, arrangement of papers, embellishments and design elements are endless. Consider adding vintage buttons, jewels or pearls for a 3-D effect.


Wednesday, June 18, 2014

Rustic Recycled Wall Plaque


My recent trip to our local Goodwill yielded some great finds. I picked up this wooden 4 x 24" plaque for $1.99. It previously read Bordeaux but that was about to change, as shown above.


I recently returned from a trip to Spokane to meet with my business partner, Jefre. We have had many laughs about his over-abundant use of saying, It's All Good and I  couldn't help myself, I had to make him this wall plaque.

I peeled off the original Bordeaux paper layer and cleaned the plaque the best I could; any rough areas were sanded. Both the front and back sides were then given a coat of matte black paint (be sure to do this outdoors). Allow to dry.


While the board was drying, I designed the lettering using MS Publisher setting my print page as 4 x 24". The extended length required three sheets of paper which were cut and trimmed to fit the front of the board.


Position the three sheets as close together  as you can without overlapping the edges. Tape the underside of the papers to keep the lined edges in place.

Align the paper onto the board, flip the board to the back side and use a pencil to trace the outline of the cut.

Cut along the penciled area and trim if necessary to fit the board.


Apply a thin coat of Mod Podge to the face of the board. Set aside and apply a thick coat of Mod Podge to the back of the paper. Make sure you apply the Mod Podge in one direction.

I used a foam brush to apply the Mod Podge mixture which are readily available from Home Depot or any hardware store.

Position the paper onto the board and remove any air bubbles with a roller.Allow to dry for two hours before applying a top coat of Mod Podge.


The Mod Podge should be applied to the front of the paper in thin coats and all in the same direction. Make sure to apply the mixture along the edges of the plaque.

I used two thin coats of Mod Podge for this plaque and let it dry overnight. Allow the first layer to dry for at least 15 minutes before applying the next layer.


To add interest, I mixed a small amount of Burnt Umber Acrylic paint with water and brushed on in random places before applying the Mod Podge. This technique will really depend on the type of paper you have used. I used a heavier gauge handmade paper for this plaque and it readily accepted the brushed paint. Thinner paper may not be so kind.

Allow the plaque (or project) to set up overnight. If you need to speed up the process, you can use a blow dryer on a low setting.


Friday, May 23, 2014

Easy DIY Get Well Greeting Card


I wanted to send a couple of Get Well cards to friends this week and decided to make my own. This was the result and it was easy-peasy to do. I've even included a printable template for you to use. Sorry, you'll have to provide your own band-aids and gauze (said with a big grin).

You can print a special greeting on the flip side of the card, or just opt to sign your name and call it good.

I used two sheets of creme color card stock paper. The card is sized to fit inside a 6 x 9" catalog envelope. It may require additional postage so you may want to weigh before mailing.

Snag the template here.

Tuesday, May 20, 2014

DIY Birthday Popcorn Cones & Stand


My granddaughter wanted popcorn at her birthday party. In keeping with the Rainbow Art Party theme I created popcorn cones and stand. It was inexpensive and made eating popcorn way more fun. The cones can also be filled with assorted candies for each party guest.

Another great way to decorate the cone box is with your child's hand prints dipped in finger paint. How cute (and fun) to have colorful hand prints covering the white paper.

You will need:

  • White craft paper
  • Color printer
  • White card stock
  • Clear tape
  • 6-inch wide netting, cut into 12-15" lengths
  • Postal box that is sized for shoes
  • Double-sided tape
  • Box cutter
  • Masking or painters tape
  • Cone template (found here)

How To:

  1. Assemble box, tape ends
  2. Use box cutter to cut 6 holes. Make holes large enough to hold the cones.
  3. Tape around edges of the cuts with masking or painters tape.
  4. Wrap box with white Kraft paper( like you would a gift).
  5. Use box cutter to make "X" cuts in each circle cut-out. Fold back the white paper in each hole and secure to inside of box with clear tape.
  6. Decorate box as desired. I used grosgrain ribbon and cutout the circle shapes that appeared on the cones. See attached PDF file.
  7. Print cone design on card stock paper and use the cone template to trace cone design.
  8. Cut out cone shape, roll and secure with clear tape.


Saturday, May 17, 2014

Rainbow Art Party for Kids


This past week I've been assembling everything I need for my granddaughter's birthday party. She decided on a rainbow theme to celebrate my newly published children's book titled Remember the Rainbow. Olivia loves to draw and paint so I suggested a Rainbow Art Party.


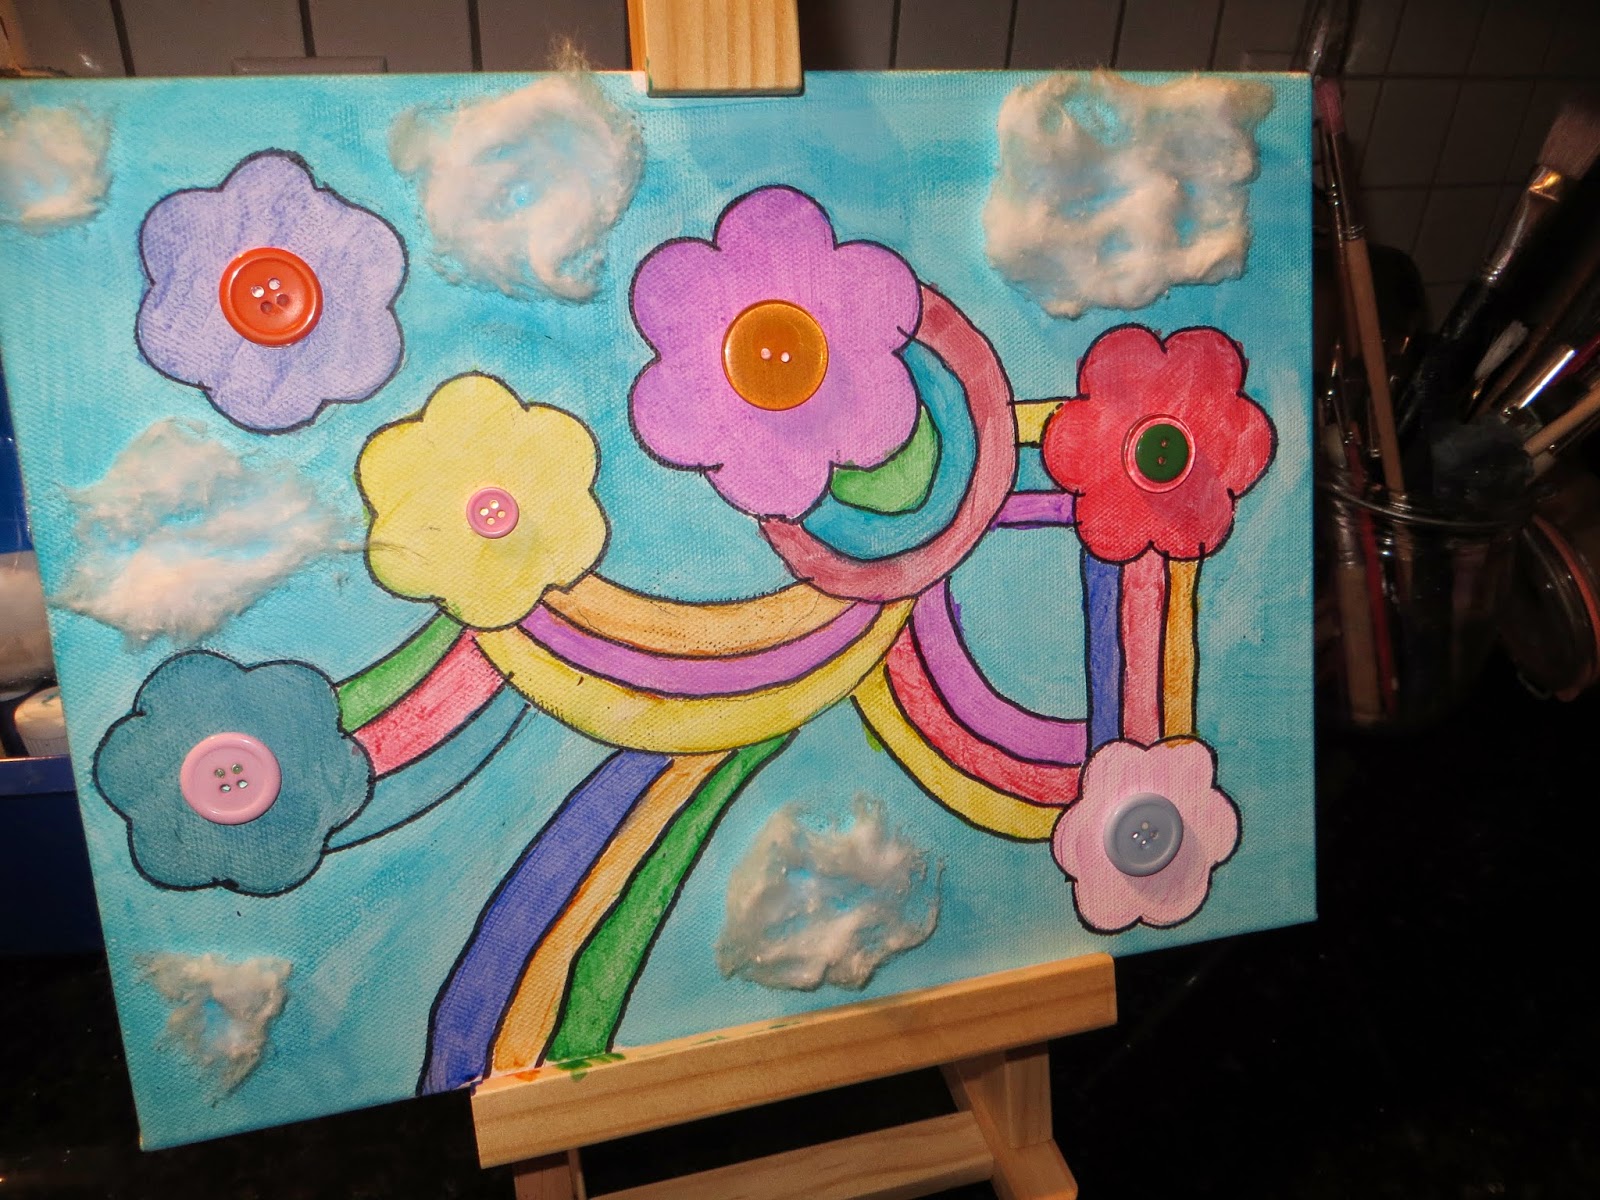
Each guest will receive a canvas with a pencil drawn design of the rainbow (shown left). Once painted, they can outline with a black Sharpie, add cotton clouds and colorful buttons.

A chalkboard greeting outside the front door  welcomes party guests.

Pizza, rainbow Slurpee, a rainbow candy bar and pink lemonade are all on the menu.


The backdrop for the photo shoot are plastic table clothes hung from a wooden dowel. I'll post pictures later of all the girls. Each girl will receive a frame to hold their photo shoot picture.


The party includes:


  • Lemonade stand
  • Jumbo rainbow slurpee
  • A colorful synergy maze
  • Gift bags that contain Crayola window markers, a copy of my new book, flavored lip gloss and a six pack of rainbow colored nail polish.
  • Popcorn cones


What is a colorful synergy maze?

Synergy is created when things work in concert together to create an outcome that done through the joint effort and cooperative action of two or more individuals.


My synergy maze uses yarn. Each child is given a color and must find their way to the end of their color to receive their gift bag. What makes it fun is that all the different colors are interwoven around obstacles and will require the joint effort of each participant to untangle their way to the prize.

This will be done outdoors which is great for helping the kids expend excess energy. They wind their yarn around a cover toilet paper roll.


I will post follow-up pics once the party gets into full gear and the final details are executed... like the giant rainbow slurpee, lemonade stand and synergy maze.

The set-up has been fun, it's the take-down that I'm dreading. But, if it creates memories for my granddaughter, it is all worth it.