Showing posts with label Tutorials. Show all posts

Sunday, November 02, 2014

Franken Soap...Fun Party Favors


Sophie Soap Chick has been at it again. She created a number of ghoulish soaps to inspire you. Mold Market's Beveled Square mold was used for the above Franken-soap design. These soaps aren't just for Halloween, they are fun soaps to be used all year round.


I plan to make these soaps for my grandson's schoolmates when I read the book Frankenstein Makes a Sandwich by Adam Rex.

SUPPLIES


 HOW TO

Green Head:
Melt six cubes of white soap base in microwave safe measuring cup. You will want a pouring temperature of around 140 degrees. Remove from microwave; add fragrance and 2 drops of GPE Neon Green colorant.

Spray the inside of the Beveled Border mold cavity with rubbing alcohol and then pour soap.Allow to set up until firm before removing from the mold.

Face:
Melt six cubes of clear soap base in the same manner as the white. Add a few drops of black colorant to the melted soap and pour into the jelly roll tray.


After the black is set, repeat the steps with White Soap Base to use for the back of the eyes. Use the Recessed Smoother Soap Tool to out the black pupils, hair, eyelids, nose, and stitches from the layer of black soap you removed from the jelly roll tray.

When the white soap is set, carve out the back parts of the eye and made sure they fit behind the already carved eyelids. Once all the cut-outs are completed, melt a block of Clear Soap Base and  attach all the facial features!

Now you have a creepy and spooky Franken Soap!


Clear Melt and Pour Soap Base
Clear Soap Base from GoPlanetEarth


Wednesday, June 18, 2014

Rustic Recycled Wall Plaque


My recent trip to our local Goodwill yielded some great finds. I picked up this wooden 4 x 24" plaque for $1.99. It previously read Bordeaux but that was about to change, as shown above.


I recently returned from a trip to Spokane to meet with my business partner, Jefre. We have had many laughs about his over-abundant use of saying, It's All Good and I  couldn't help myself, I had to make him this wall plaque.

I peeled off the original Bordeaux paper layer and cleaned the plaque the best I could; any rough areas were sanded. Both the front and back sides were then given a coat of matte black paint (be sure to do this outdoors). Allow to dry.


While the board was drying, I designed the lettering using MS Publisher setting my print page as 4 x 24". The extended length required three sheets of paper which were cut and trimmed to fit the front of the board.


Position the three sheets as close together  as you can without overlapping the edges. Tape the underside of the papers to keep the lined edges in place.

Align the paper onto the board, flip the board to the back side and use a pencil to trace the outline of the cut.

Cut along the penciled area and trim if necessary to fit the board.


Apply a thin coat of Mod Podge to the face of the board. Set aside and apply a thick coat of Mod Podge to the back of the paper. Make sure you apply the Mod Podge in one direction.

I used a foam brush to apply the Mod Podge mixture which are readily available from Home Depot or any hardware store.

Position the paper onto the board and remove any air bubbles with a roller.Allow to dry for two hours before applying a top coat of Mod Podge.


The Mod Podge should be applied to the front of the paper in thin coats and all in the same direction. Make sure to apply the mixture along the edges of the plaque.

I used two thin coats of Mod Podge for this plaque and let it dry overnight. Allow the first layer to dry for at least 15 minutes before applying the next layer.


To add interest, I mixed a small amount of Burnt Umber Acrylic paint with water and brushed on in random places before applying the Mod Podge. This technique will really depend on the type of paper you have used. I used a heavier gauge handmade paper for this plaque and it readily accepted the brushed paint. Thinner paper may not be so kind.

Allow the plaque (or project) to set up overnight. If you need to speed up the process, you can use a blow dryer on a low setting.


Tuesday, April 16, 2013

How To: Easy to Make Tull-ific Door Wreath


My six-year old granddaughter (soon to be seven, as she will quickly point out) is all things 'girlie". If it's pink or purple, she owns it. If it's anything that sparkles it's hanging in her closet. I'm fairly certain she will embrace this Tull-ific door wreath I made for her over the weekend. It has 4 interchangeable signs that hang in the center of the wreath. She can flip to whatever sign suits her mood. There should be a 5th sign that reads: DO NOT ENTER... I'm in Time Out!

The first step is deciding on your color palette. I selected colors in my granddaughter's bedroom, but you can do a autumn, Christmas or colors that match your décor.

I used pre-cut tulle on rolls. You can purchase tulle by the yard at fabric stores and cut into strips if you are so inclined. I find the rolls easier to use and store.

My wreath uses 19 and 24" lengths (the tulle rolls are 6 inches wide). 


For added interest I also used three different grosgrain ribbon patterns; solid, dots and striped. The white Styrofoam wreath is 18" in diameter; a 12" diameter will also work.

The finished wreath has roughly (42) 19" tulle strips, (36) 24" tulle strips and (12) 15" cuts of ribbon.  I cut about 1/3 of what I thought would be needed until I got a feel for how much area each tied piece would cover.

This is a craft that is ideal for camps, vacation bible school, after school activities or in a classroom. No water, glue or messy clean-up is involved; just a pair of scissors and a ruler.


 I noted a couple of different techniques were given for attaching the tulle to the Styrofoam. The first method of threading the tulle through a loop didn't work. It took less time, but the tulle didn't stay attached to the ring. That method is shown below.


First looping method did not work well.

The best method was wrapping the tulle around the ring twice (as shown below) and then tying off in a knot. It's really that simple. Continue wrapping and tying the tulle strips until the ring is completely covered. You can embellish with flowers, painted wood cut-outs, ribbon, bows...there are countless options.  
 
 
I placed six, 24" strips between seven 19" strips, alternating in color sequence around the ring.

Example: My six 19" strips consisted of dark purple, light purple, dark pink, light pink, dark purple, light pink. The 24" strips consisted of glittery pink, white, a strip of ribbon, white, glitter pink, two strips of lime green.

Fill in any sparse areas after the wreath is finished. I left the tulle edges straight on the shorter pieces and made a v-cut on the longer pieces. You can even round the edges if you want.


Here is the wreath hanging.


Here is the wreath lying flat.


Here are the door hanger signs for the wreath. I made them using a photo editing program and then printed on card stock. A scrapbook punch was used for the hang-hole. A hook attached to the back side of the wreath will allow my granddaughter to switch out the signs at will. My honey-man is making the hook. Not yet sure how or with what, but he promised he had a plan.


Friday, April 05, 2013

Small Gift Packaging: Make a Paper Tray


Mother's Day is just around the corner. We've been playing around with some gifting idea for small products... namely, soap! The wrapped box is one of GPE's soap boxes wrapped in Kraft packing paper. I love the simplicity of Kraft paper and the countless ways it can be embellished for just pennies.

The orange band is scrapbook paper that was cut to size. A paper heart doily was trimmed to fit the corner of the box. A scalloped circle was stamped out from vintage paper and a craft button added. The technique used to make the vintage paper is easy and I'll share in a future blog post.


The tray box was made using a 6 x 6 inch piece of double sided scrapbook paper. Two opposing edges were stamped out with a border stamp and then scored for folding.

I've given the steps below to cut and form the tray box. Where you make the folds and cuts will vary depending on the product you will be placing in the tray.

I sized my folds to fit two, one-ounce bottles that I will fill with lotion and shower gel.


 1) Stamp two opposing sides with a border stamp.

2) Use a scoring board to make score lines for folding.

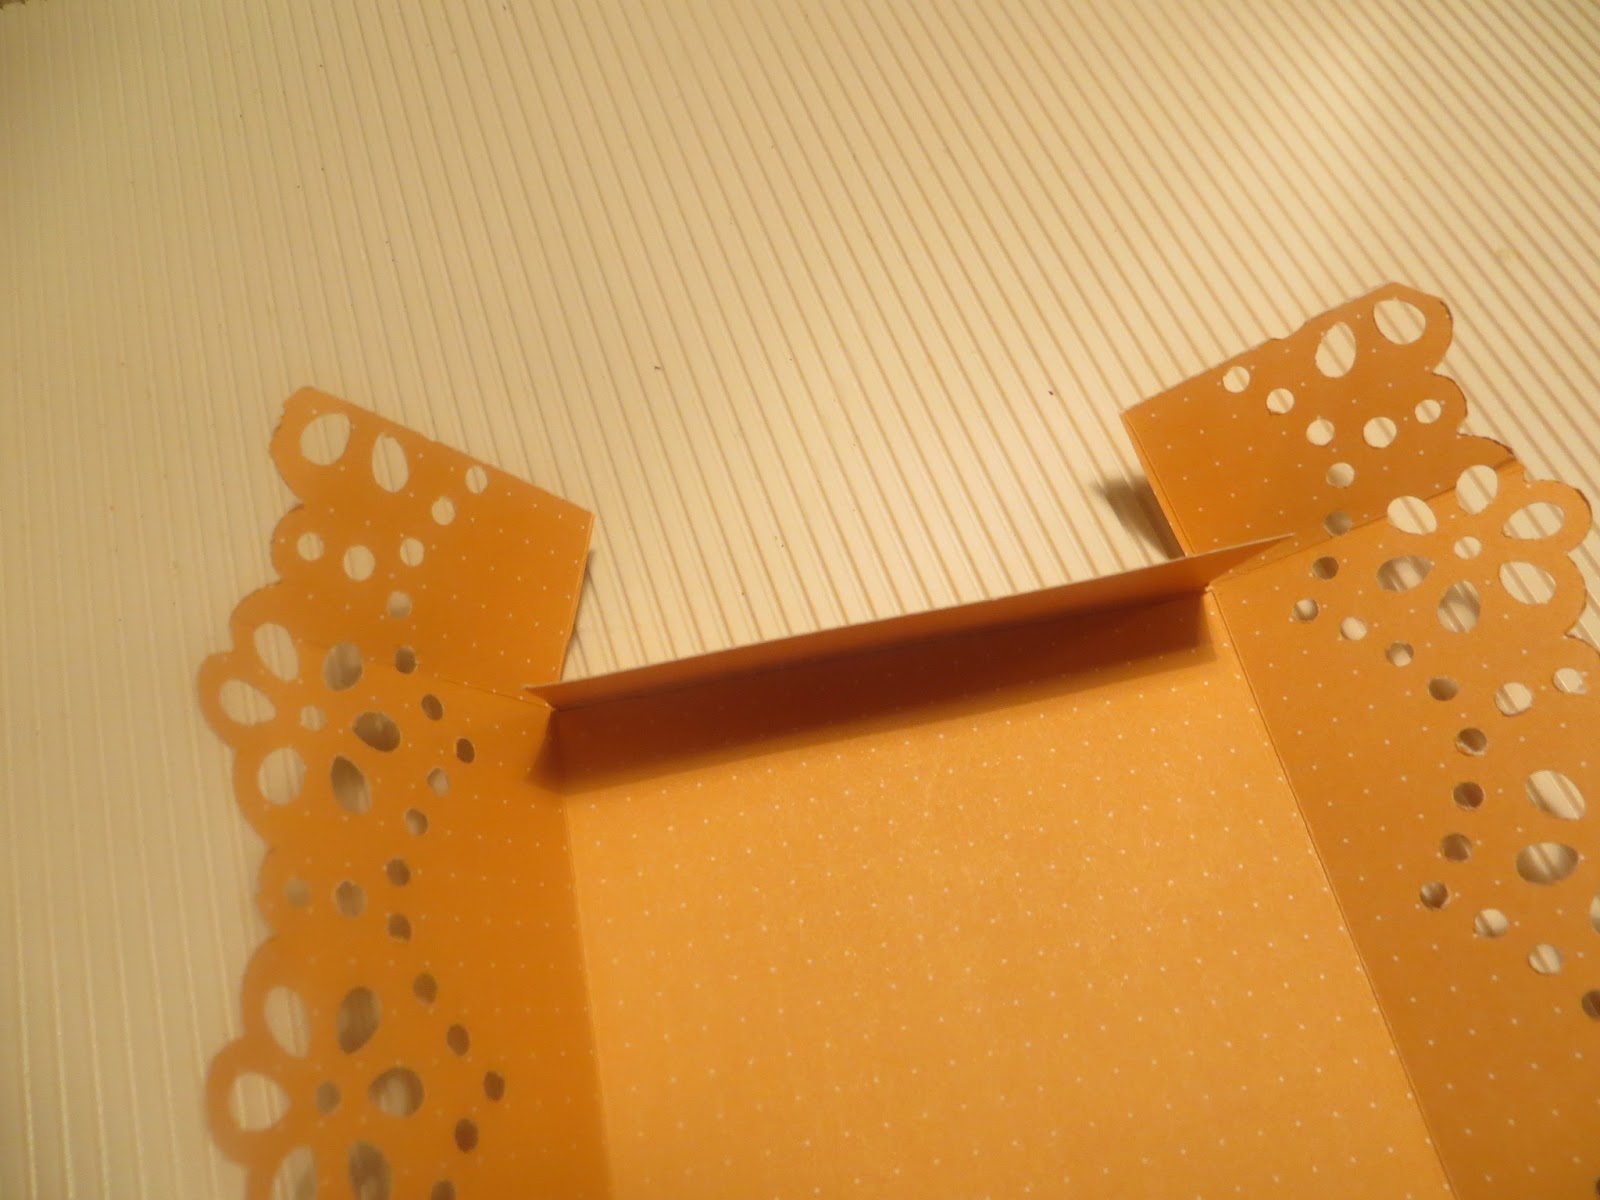
3) Cut the corners as shown and make fold along all score lines to form the tray.

4) With an Exacto knife or box cutter make two small cuts on each end of the box (the ends without borders).

5) Insert the borders sides into the cuts to make sure they fit well. Use double sided tape on the corners of the tray (near the slits). Slide the bordered edges into the slits and press down on tape to secure in place.

Fold along score lines.

 Fill the tray box with coordinating shredded paper and position your product for display. The small trays are ideal for showcasing soap and small bottles of toiletry product at craft shows or in retail settings.

You different papers to create seasonal trays for Spring, Fall, Easter, Christmas or Thanksgiving. Experiment with different border stamps and paper sizes.

At most, this decorative paper tray cost about a nickel. Your only investment is a border stamp, but they are reasonably priced at craft stores and it can be over and over again. Consider it an investment.


 You can adapt this same box tray technique to make a small lidded box. Just make the box lid slightly bigger so that it slides over the base of the box.

Thursday, June 16, 2011

Melt & Pour Soap Making: Hand Carved Gem Stone Soaps


Woo Hoo...look at these little gems. Hand carved from blocks of colored soap. Our Sophie Soap Chick does it again. She took an idea and ran with it! Antique copper and turquoise liquid gel colors were used for these soaps. I'll have more details next week on the "how to" part. Soaps averaged between 1.7 to 2.2 ounces.

Our silicone or Mold Market square loaf was used to pour the big block for the carved soaps. The big block was then cut into smaller blocks to carve. Make sure you save all the extra soap scraps left from carving. You can use them for other soaping projects.


Thursday, January 13, 2011

Valentine Melt & Pours Soap Projects


Here's a recap of some of the Valentines soaps we have done in the past. You will find information on how to make these soaps under our Tutorial RESOURCE section of the GoPlantEarth web site.

Cupid's Heart Soap

Wednesday, November 24, 2010

Melt & Pour Soap Making: Soap Gelato Recipe #2

I'm a bit behind in posting this recipe and I apologize. I have had a number of emails asking for the Gelato Recipe #2. This recipe omits the citric acid (which gives the Recipe #1 some fizzing action in the tub).

Recipe #2 is more of a body butter soap. You are going to want to let this recipe set up for a while before you scoop into your gelato cup. If you try to scoop too soon, you may find the mixture too soft and you'll end up with a Gelato Glob. That's not exactly the visual effect you are hoping for. However, don't let it set up to the point that it is firm. Then you will have on heck of a time trying to make your soap scoops. Once the soap scoops sets up, they will be firm and when used, the scoop will be like a ball of soap. There is no fizzy or foaming action.


RECIPE #2
(all of these items are available on our web site, including the Gelato containers)

  • One pound body butter whip

  • 1 pounds of opaque (white) melted soap base

  • 2 tablespoons vegetable glycerin Start with 2 tablespoons, but you can add an additional tablespoon of glycerin if your mixture seems overly pasty.

  • 1/4 cup white sugar (yep, the kind you use in your morning coffee!)

  • 3 Teaspoons of fragrance oil

  • DWP soap colorant. Add a few drops until desired color is achieved.


Place your body butter whip into a mixing bowl. A stainless steel mixing bowl is best. Using a handheld mixer, begin to whip on medium speed. Once whipped add the melted white soap base and fragrance. Incorporate the melted soap into the whipped body butter and then continue whipping on low speed adding the liquid glycerin and any colorant in the process. Slowly add the sugar , folding it into the mixture just like you would do if baking.

Let the mixture set up for a brief period (suggesting 30 to 45 minutes) before you start scooping. Do a test scoop to see if the mixture is firm but still somewhat pliable. A squirt of Pam inside the ice cream scoop can help with release issues. Sometimes the mixture gets a bit stubborn and doesn't want to release. If you don't have Pam on hand, just rub the inside of the scoop with a very thin layer of vegetable cooking oil.

That's pretty much it. Scoop the mixture into your gelato cups. You can do one scoop or two. Remember, this recipe is type of soap scrub. It is for cleansing and not for making fizzing bath water. Enjoy!

PS: Check out the wooden spoons we sell for the gelato cups. A nice finishing touch to your handiwork. We place the wooden spoon lengthwise into the soap scoops and the secure the gelato lid to the cup.


Tuesday, November 09, 2010

Soap Making Recipe: Fortune Cookie Soaps

As promised, here is the recipe used for our fortune cookie soaps that will be featured at the annual "Girls Night Out" holiday soap making event sponsored by GoPlanetEarth. Below is the recipe we will be using.

  • 12 ounces FLEX white soap base
  • 2 teaspoons water
  • 1/2 teaspoon glycerin
  • 3 teaspoon fragrance oil (you may use less depending on the fragrance type)
  • few drops of Leaf Brown color (we wanted a creamy looking base so the leaf brown took the edge off the sharpness of the white base)

A thin layer of the melted, scented and colored soap base was poured into either the 8 or 9 inch silicone jelly roll mold. Once the soap set up (about 10 minutes depending on the pouring temp) we use a 3 1/4" round cutter to stamp out the circles.

I found this recipe to work very well as long as you keep a eye on the poured soap. You will want to release as soon as the soap is firm enough to not show "crinkles" when removing from the mold. Immediately stamp out the circle area, fold in half gently squeezing the edges together. I used my finger to place an indent in the center of the soap and then folded into the fortune cookie shape. You need to work fast. The soap needs to remain pliable when making the fortune cookie folds.

Here is a great link for printing fortune sayings to place inside your soap cookies.

Good luck!!

Sunday, November 07, 2010

Melt and Pour Soap Making: Fortune Cookie Soaps

This weekend I've been working on Christmas gifts. One of those gifts included fortune cookie soaps. I'll have a tutorial posted on the web site soon, but here is a sneak peek at the soap cookies. My annual "Ladies Night Out" soaping event is coming up soon, and this will be one of the featured projects.

I'll be making a number of different fortune cookie types, but this first go around was a cinnamon chocolate scent drizzled with both chocolate and vanilla colored goodness.


I had a dinner party to attend the same day I made these soaps and needed to bring a hostess gift. I quickly packaged the finished soaps to hand out at "treats" to the guests and then put together a Chinese take-out gift box for the hostess. I packaged two cookie soaps in each glassine bag and then printed up labels to seal the bag. Ribbon was applied to the outside of each bag using double sided tape. The final presentation was quite impressive.


A printed fortune was placed inside each cookie. The trick to this project is having the soap base the precise consistency to fold and bend each cookie into its shape. And yes, there were plenty of blunders when doing this project. The good news... the iced topping helped to cover those blunders. I'm off now to do another batch to ensure that the recipe I post is accurate! Wish me luck.

Sunday, October 17, 2010

Soap Dishes: The Project Part III

Here we are into Part III of our soap dish project. In Part II, I posted the recipe for mixing the concrete and sand. This post shows a big leaf bowl that my friend, Peg designed. She's really gotten the hang of how to make these dishes and I wouldn't be surprised if some of her work is displayed at one of our local Art Fairs. I can't wait to see how she paints the bowl. I'll be sure to upload pics of her finished bowl.

As you can see in the first pic, Peg placed a leaf inside the molded bowl. She did this by placing a large leaf on top of the sand hill (that is covered in plastic) and then slowly began adding the concrete mixture until she had built up her bowl to the desired size and thickness (see below). The leaf still inside the bowl will be removed by hand. Sometimes the leaves remove easily, others require a bit more work. Peg was working on removing the leaf from the inside of bowl when I snapped the photo.

Large leaves were then pressed into the bottom of the bowl (vein side down). The deeper the veins, the better the results. Hosta, rhubarb, hollyhock, comfrey are all great leaves to use for this project.

Here is the bottom of the bowl once the concrete dried. As you can see, the leaf impressions are very defined. Peg will now use a Dremel bit to smooth around the edges of the dish before painting. Be sure to wear protective eyewear when working with a Dremel. Dremel kits can be purchased at stores such as Home Depot or Lowes.

For those unfamiliar with a Dremel, it is pictured below.