Showing posts with label Product Feedback. Show all posts

Monday, May 06, 2013

Melt & Pour Soap Making: Embellishing Your Soaps


Mold Market's soap molds take soap making to the next level. If you don't believe me, take a look at what Maria at Kokolele Soap has done with Mold Market's ice cream cone mold. Maria told me she was so delighted to discover this mold could me used to make a 3-D soap.


Mold #239 (Soft Serve Ice Cream) has a flat back. However, when you join the halves, you get this wonderful 3-dimensional soap which you can embellish to your heart's content.

Maria's soap artistry is amazing.

These are the new border trims from Mold Market available in June 2013. Use them to embellish your soaps. There are six border strips on each mold.

 
Here is a former blog post on how to make the different colored layers for the ice cream soap.


Here is another creative soap by Maria using Mold Market molds. I have purchased a number of soaps from Maria's Etsy shop and I must say, they are perfection with lovely packaging and labels.


The above soap is made with Mold Market's cupcake base and a small bath bomb mold. The two pieces are connected with clear soap base and embellished with a rickrack soap border.

Saturday, February 23, 2013

Newsprint Bags: Pre-Buy


A few days ago I posted about these newspaper bags made by street children in India. The story and message behind this organization's endeavor to house and educate school-aged street children is quite touching.

After personally speaking with someone from this company via phone, I am convinced my decision to import these bags is a good choice. Yes, yes, I know it's not an American made product. But knowing this program is helping children abroad is worthy of my support. Hurrah! Accolades to this organization for finding a creative and ingenious way to generate income for shelter and education. LOVE IT!!

Here's the PRE-BUY offer on these bags. Pre-buy deadline is March 9, 2013, 11:59 PM, EST.
Pre-payment required. Limit is 50 bags per size and shipping address must be within the continential USA. All bags have jute handles. There is a NO return policy on this pre-buy.

Orders ship week of March 11, 2013

Size #1:
11 1/2" long x 9 3/4" wide x 3 1/4" side gusset

25 bags = $26.00 USD plus $12.60 S/H
(cost per bag with shipping = $1.54)
Total cost: $38.60


50 bags = $49.00 USD plus $14.25 S/H
(cost per bag with shipping = $1.26)
Total cost: $63.25


Size #2
8" long x 5" wide x 3" side gusset

25 bags= $22.50 USD plus $9.95 S/H
(cost per bag with shipping= $1.29)
Total cost: $32.45


50 bags= $41.00 USD plus $13.50 S/H
(cost per bag with shipping= $1.09)
Total cost: $54.50


Tuesday, February 19, 2013

Packaging: Making a Difference One Bag at a Time

We recently stayed at a private ski resort in Northern Michigan courtesy of my husband's employer. It was a weekend of skiing, eating and just plain fun, not to mention the awesome wine tasting the company sponsored. A trip to a nearby eclectic specialty shop brought me back to reality.

This shop was awesome beyond description. Their collection of unique items included furniture, trash to treasure, handcrafted art, vintage items and more. I could have spent hours just browsing. I made a few purchases for the grandkids. It was at check-out that my reality check kicked in.


The purchased items were placed in this newspaper bag. I thought, "How clever is that, someone is recycling newspapers". I then noted the newsprint was not in English and saw a tag attached to the jute handle. The message on the tag was the reality check.

I know I can't save the world, but here I was staying at a resort, shopping upscale boutiques, enjoying great food and wine while someone in India was making this newsprint bag to stay off the streets. Geez, what do I have to complain about? NOTHING! The income generated by these newsprint bags provides street children with education and shelter.

The workmanship is awesome and I've decided to import these bags in two sizes. They will arrive within the next month.

If you own a retail shop, I invite you to contact me about using these bags in your store. They are made from recycled material, eco-friendly and support an organization that rescues children from the streets of India.


As soon as our first shipment is received, I will post pricing information on both my blog and the GoPlanetEarth web site.

Sunday, January 13, 2013

Melt & Pour Soap Making: Decorative 3-D Spring Soaps


Melt & Pour Soap Making: Decorative 3-D Spring Borders

In Michigan, Spring is a few months out. But that didn't stop us from creating soap to celebrate the upcoming season. Our newest silicone nature mold coupled with Mold Market's Basic Circle mold produced this beautiful soap.

We will be featuring a short tutorial on the how to recreate this soap. I'm excited to see the many design options that can be done with these decorative soap pieces. Stay tuned for more creative ideas.

Flexible Silicone Borders for Melt & Soap Making
 
We also have a buttons & bow silicone border mold. You can check it our here.
 

Tuesday, November 27, 2012

Melt & Pour: Follow-Up on Overcoloring Soap


In a prior post, I discussed issues with over coloring melt and pour soaps. This follow-up post shows the results of how the same pigment can give different color shades. GPE's Neon Bright Purple was used in this scenario.

The ice cream soap on the left was colored using white soap base. As you can see, the soap isn't even close to purple color. The opacity of the white soap base causes the purple pigment to soften to a pinkish, magenta color.

The center soap is closer to a lavender color. I used the Neon Bright Purple, but added a very small amount of Neon Bright Blue which yielded a soft lavender in white MP soap base.

Pictured right is clear soap with Neon Bright Purple colorant added. It's definitely not a true purple, but more of a mulberry color. To achieve a "true" purple color in clear MP base, you need to add a small amount of Neon Bright Blue.

If you take a close look at the far right soap, you will note that some of the white dots around the inside edge of the mold have faded away. This happened because the second soap layer was poured at too high of a temperature. It melted portions of the white dots causing them to migrate slightly into the purple/mulberry color.


My final test results showed that the Neon Bright Purple did not migrate or have bleeding issues when used relative portions. Adding extra color to deepen color intensity is going to create over-coloring issues. The soap pictured above sat for several days with no signs of color migration.


If you compare the two ice cream soaps, you will note that the second one is WAY over-colored. The Neon Bright Purple should resemble the lighter shade ice cream soap when used in white (opaque) soap base. If you want a "true" purple, use clear soap with equal parts of Neon Purple and Neon Blue colorant.

Wednesday, November 21, 2012

Melt & Pour Soap Making: Can you Overcolor?


I have been working with a customer on a coloring issue. It's one of our faithful non-bleeding liquid gel colors (Neon Purple), but for some reason there are apparent problems. The big question is was the soap base over colored or is there a problem with the color formula. That's the investigative part we are currently working to resolve.


As you can see in the above customer photo, the purple isn't fairing well. The color has migrated into the dove and the square chunks in the loaf slice. In my test run of the purple colorant, I tried to achieve the same shade of purple as shown above in white soap base. I was fairly certain this hue might possibly be a color overkill. Below is what I would expect the Neon Bright Purple color to look like when added to white MP soap base.

Although it may look similar in color, the purple dove background is actually much darker in color. It is close to the over-color we did with our oval Popsicle mold shown below. It was over-colored to the point we actually could use the soap bar as a crayon.


The purple already started bleeding (migrating) onto the white cone after 12 hours. For a soap maker, there is nothing more frustrating than wasting time and materials on soaps that don't return a profit.

This is why GPE takes it seriously when a customer reports a problem with one of our products. Usually it's an easy fix. However, in a case like this, it requires testing on our end and a one on one with our color lab.

What we did discover while working through this color issue, is over-coloring is perfect when making our soap crayons. They actually do yield color that can be used in the tub. My 9-year old grandson tried out the over-colored soaps and was delighted at how well they worked. We will be testing them in the shower over the weekend. Here is what he colored on paper.

A sure way to know you have added too much color to MP soap base it the above scenario; you can use it like a crayon. I'm still not convinced the color migration isn't due to over-coloring. GPE has stocked the Neon Bright Purple for years with no reports of color bleeding. I'll do a few more test batches and report my findings.

Sunday, January 29, 2012

Melt & Pour Soap: Suspension Base


Suspending glitter and botanical product in soap has never been easier. GoPlanet's suspension soap base does it for you. Pictured above is a bar of soap made with Mold Market's Rounded Rectangle mold (which BTW, is an awesome mold). The soap has two layers. The first layer was poured with suspension base and cosmetic glitter added. The secret to successfully using this base type is letting it cool down slightly before adding your ingredient. Once the glitter layer set up, a second layer of colored soap was poured that did not include the glitter.


As you can see, the glitter has remained evenly suspended throughout the first pour.


GoPlanet is giving away a $22 gift packet that includes:
  • 2-pounds suspension melt & pour soap base (clear)
  • (1) Mold Market Rounded Rectangle mold
  • 1 ounce cosmetic glitter
  • 1 ounce fragrance oil
THE SCOOP
One lucky recipient will receive the above gift. You must live within the continental USA for us to pay shipping, otherwise shipping is your expense.

Email name and shipping address to info@goplanetearth.com. Email MUST INCLUDE a brief comment about your favorite GoPlanetEarth product.

Entry deadline is February 5, 2012, 11:59 PM EST. Each entry is assigned a number. The winning number is selected from a random drawing conducted by an outside source.

Sunday, December 04, 2011

Absolutely Inspiring Soap Design


This soap design by Omar is stunning. The colors are breathtaking and the shapes lend themselves well to the design concept. The soaps made by Omar are inspiring to say the least. They are true works of art. I hope this post inspires you to think outside the soap box and experiment with new designs, colors and shapes.

A number of years back, I remember a comment made to me by a colleague in the business. She said, "You can only do so much with soap and soap mold designs." Well, I think that's a bunch of hooey! I see individuals stretching the boundaries everyday. This is just one example of the talented soap artists in the industry.

Saturday, October 29, 2011

Green Apple Soap from Hemp & Mango Butter Base


This weekend is an intensive soap testing weekend. I like to be certain that all of our soap bases our performing well for customers. The only way to know is to test each base in various applications. Because our Hemp Butter and Mango Butter are very "hard" bases, I was a bit concerned how they would fair in a loaf mold when sliced.

They were awesome. Although both bases crumbled when initially cut from the scored block, once melted in the microwave that all changed. The hardness of the soap makes for low sweating and once the soap set up, it cut easily. The above picture showcases how well both these bases worked.

This soap base was scented in green apple fragrance (my honey man's favorite). I've been promising him some new soap and his grin alone told me how delighted he was when presenting him with the soap slices. It's weird, guys don't like to admit it, but they really do like soap.


The green color is made with hemp butter base colored with lime green and a smidgen of neon green. The white band is the mango butter base, no color added. I give both of these melt and pour soap bases a thumbs up based on my test results from today. Don't let the initial cut into the cubed soap base fool you. Even though the base crumbled somewhat when cubing from the scored block, once I melted in the microwave, it was all I had hoped it would be.

Friday, April 29, 2011

Empty Pallets, Empty Cartons: Thanks Missy!


This has been a very busy stock week. Pallets of soap base and cartons of soap molds along with other misc shipments. Missy is in charge of incoming stock and she worked hard to get everything put on the shelves. The overflow of stock had to go to our second warehouse which meant having to use a dolly cart in pouring rain to move the stock. Our overflow warehouse is just a stones throw from our main place, but wouldn't you know this entire week would be rainy weather. Missy was a trooper and did what she had to do. Thanks, Missy for all your hard work.


Our new GPE soap bases arrived and are ready to ship. We now stock Mango Butter, Hemp, Olive Oil, Avocado Oil, Goat's Milk, Shea Butter, Clear and White bases in 2-pound scored blocks. We are also having a couple of new formulations done for us... I'll keep you posted on those at a later date.


Meet Missy.... she wouldn't let me take a picture of her face. She said she was too sweaty and it wouldn't be a complimentary photo. So instead, meet Missy's foot. The foot that bears the tattoo that I sooooo didn't want her to get. It reads "FAITH". I know, I know...I'm not a tattoo person. You will note that she didn't listen to her boss and got it anyway. Missy has been with GoPlanet for 7 years now. She is finishing up her teaching degree this year and will be student teaching in the Fall. I'm going to miss her when she leaves. I fully expect Missy's future children to work for me. She's like family at this point. Just wanted you to meet one of the great workers we have here at GPE. BTW, Missy is adorable with beautiful red hair, lots of freckles and an infectious smile and laugh. I call her my "3rd" daughter!


Sunday, April 17, 2011

Vanillin: The Final Test Results


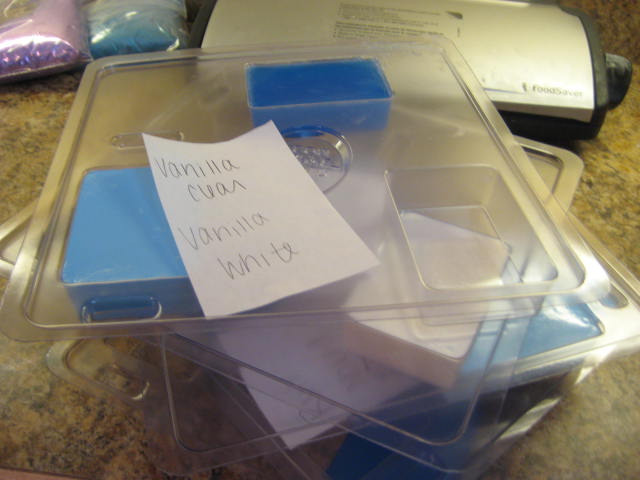
After several weeks of waiting to see how the melt & pours soaps would react to various vanillin percentages, the final results are in. Quite honestly, the soaps look pretty much the same as they did 11 days ago when I did my first testing review. As you can see in the above picture, the non-darkening vanilla had poor results. (L) is the non-darkening vanilla fragrance in clear soap base. It was was originally colored in our Neon Bright Blue liquid gel color. At this point the color has become completely "opaque" and darkened to an almost navy color. (R) soap was a white base that was scented and colored the same. It, too, has darkened and the color has changed substantially.

The picture below really tells the story of how much the color has changed. Soap on the (R) is the original color. As you can see, there is a major color difference several weeks later. At this point, I am fairly certain that we will be discontinuing the Non-Darkening Vanilla fragrance oil. You will understand this decision even more when you see how the Vanilla fragrance oil compares in the test results. Also, the longer the Non-Darkening Vanilla soaps sat on the shelf, I began to note a slight"off" smell to the scent.


Pictured below are the test results of the vanilla fragrance oil in both white and clear soap base. It scored well in my opinion. There were no brown spots and only a slight change from the original blue color (the clear base seemed to darken slightly more). The fragrance held well.

The soaps with vanilla fragrance and mixed with vanilla stabilizer were uncolored (below). As you can see the white soap base has turned a light eggshell color. The clear soap base has remained fairly transparent. I gave this a thumbs up and believe the vanilla stabilizer does help prevent brown spots and color change is minimal.


The biggest surprise for me was how well our Peppermint Fragrance tested. It has a 10% vanillin content and the soaps and the blue colors never changed. Peppermint scent remained stable as well. The Butt Naked (with a 5/8% vanillin content) did have a very slight color change. I found that odd since it had a lower vanillin content than the peppermint fragrance.

Bottom line is you need to test your soap base with your fragrance selection every time. Keep a soaping diary on what works and what doesn't. Taking pictures of your test results is also helpful. Once our new GPE soap bases are in stock (should be very soon!), I will be testing them as well to see how they fair with many of our fragrance oils and especially those with higher vanillin content. The raw ingredients in soap bases can also affect how well certain fragrance oils perform. Again, this is why you will want to keep accurate records and test in small batches.


Wednesday, April 06, 2011

Update on Vanillin Fragrance Testing

Bet you thought I had forgotten my promise to update you on our Vanillin testing? Not to fail. Here are some updates after 5 days. Soaps were poured on Friday afternoon (April 1).

Here are the results as of this morning at 10 AM (April 6). In photo #1 (four soaps shown above): The soaps on the left were colored with our bright neon blue liquid gel colorant and scented with Butt Naked fragrance oil. I selected Butt Naked because it has a 5.8% vanillin content. I tried to get a good mix on the percentage of vanillin in the fragrances tested. The soaps to the right (that look darker) were colored exactly the same as the soaps to the left. However, they were scented with non-darkening vanilla which has a 1.95% vanillin content. Oddly enough, it turned the soap much darker . There are no brown spots on any of the soaps to date but I want to let them all set for another couple of weeks to see what happens.

In the above pic (two clear soaps): Soap to the left that looks darker was our extra clear soap scented with vanilla (17% vanillin content). Vanilla stabilizer was added. As you can see, the soap does not have any brown spots (yet, and maybe it won't!), but, it has darkened. The soap on the right is our extra clear with no fragrance added.

(PS: There is this annoying little round black spot on the lens of my camera. I can't get rid of it. Think it's time to buy a new one. You will see it on the soap to the right. Sorry! I've tried cleaning the lens and that spot still appears.)

In the above pic: Our GPE clear and GPE white base was colored with the neon bright blue liquid gel color and scented with vanilla fragrance oil. Amazingly, the colors have not changed or darkened. We will see what happens in the next two weeks.

My final observation is that the vanilla fragrance with vanilla stabilizer added helped to prevent brown spots and browning, but it does darken the soap. You can see this in the above pic. The GPE white soap base has definitely turned slightly darker as did the GPE clear.

I'll give you another update in a few weeks. At this point, I'm not so happy with the non-darkening vanilla and will have to consider whether it's a fragrance I want to continue to carry. One of the other fragrances tested was our Peppermint. It has a 10% vanillin content. I was quite surprised to see that there was no color change in either the white or clear colored soap base. It seems that if coloring your soap, you may not notice any darkening of the soap unless you use the "non-darkening" vanilla fragrance. It's puzzling to me why that would darken and the other scents had little or no color change. Odd! Life is full of mysteries.

Friday, April 01, 2011

The Proof is in the Pudding... Oh, I Mean Soap!

The true value true value or quality of something can only be judged when it's put to use. That's exactly what we have been doing today with our vanilla color stabilizer. We have been testing it with our Vanilla Fragrance oil (FO) to determine how much it helps to keep away those dreaded brown spots in melt and pour soap base.


We are testing not only the Vanilla Stabilizer, but also several FO's that have high vanillin content. We will need a few days to chart our results. The fragrance oils tested today are Butt Naked (5.8% vanillin content), Vanilla (17% vanillin content), Vanilla Non-darkening (1.95% vanillin content) and Peppermint (10% vanillin content). We are using both white and clear bases. We'll keep you updated on our test results.

Thursday, March 24, 2011

Soap Making: The Browning Battle

If you are new to soap making you may not yet engaged in vanillin warfare, but rest assured you will. I call it the Browning Battle and one rarely wins. Here is a recent test we did using our Non-Darkening Vanilla fragrance oil in both cold process (right) and melt and pour soap (left). This particular fragrance is not intended for use in CP (cold process) soap, but I wanted you to see the results. Believe it or not, the soap on the right was white when we started out. As you can see, over the course of a few days it darkened to a deep chocolate brown.

The white melt and pour soap was less dramatic, but you can note how it has change to a rose color. The Non-Darkening Vanilla fragrance did help, but it did not keep the soap white. It didn't darken to a brown shade, but it also did not work as well as we had hoped. My next test will be to see how this fragrance performs when the soap is colored. Since we now know that the soap will lean toward a rose color, we can factor this into how our color choice will ultimately display.

Based on the color wheel, we know that the rose color is a red hue, so adding blue to the soap is likely to produce more of a lavender shade. Vanilla is such a wonderful scent and also found in many other fragrance types such as Peppermint. You don't want to avoid these great fragrances, you just need to learn to work around them by testing in small batches and make notes of your successes for future batches.

Friday, January 28, 2011

DIY Room Spray

I went shopping with my daughter last week at Kohl's. We were heading for the check-out when my daughter stopped and picked up a bottle of Linen Spray.

"OMG", she said. "I love this stuff. You spray it on your sheets and they smell wonderful."

I took one look at the price and gently pried it from her hand.

"What are you doing, Mom?"
"I'm going to make you a home-brew and trust me, it will be 1/4 of the cost."

I had a container of a new linen base that I was sampling and this was the perfect opportunity to give it a try. I had some extra bottles and sprayers lying around and I knew I could whip up a scent similar to the one my daughter coveted. I used a 3 to 1 part ratio (1 being the fragrance oil). A few vigorous shakes of the bottle, and the results were awesome. I used Lavender, Island Retreat, Silk & Cashmere and Martini Rose fragrance oils. I kept the labels very simple using natural kraft 2-inch round circles. A few squirts in the air and.... wow... the aroma lasted for hours.

I can't wait to give my daughter her new home-brew linen and room spray. I'm giving serious consideration to stocking this linen base. I'm certain that you could do a 2 to 2 part ratio and still have a powerful scent. I'm pretty impressed with this product, but want to do some more testing. I'll keep you posted if we decide to add this product to our line-up.

Sunday, December 12, 2010

Experimenting with Soap Colors: Missy's Test

It's been so hectic at GoPlanet fulfilling holiday orders that we're finding little time to play with some of our newest Mold Market soap molds. Hopefully, between the Christmas and New Year break, we'll have more time to experiment. That's the part I like the most about this business, but the part I rarely have time for anymore ;(

One of my workers, Missy, did some experimenting with a few of the molds just to get a feel for different colors that we might possibly use when doing the final soap pours. She used the Plum Leaf mold, the Pebble Rock Bar, and Oblong Leaf. The plum leafs are very elegant and if using the "injector tool", very easy to fill in the high ridges with a contrasting color. This was Missy's first time using the injector tool and it took her some time to get the hang of it. The secret is having the soap base at a high enough temp to fill the tool and then quickly use the syringe mechanism to fill in the areas you want to color.

I immediately fell in love with the Pebble Rock Bar. The creative possibilities are endless and I'm excited to see what natural stone combinations we can come up with. Although, the red cabbage and antique silver combination shown above looks pretty neat. Below this same soap was poured in jade and antique gold stones and filled with a yellow oxide colored base.


I have some unique color combos in mind for the Oblong Leaf mold. I want to do something that's out of the ordinary....not the colors you would normally expect to see in a leaf. Stay posted. As time permits, I will be working with some of our newest molds, including the Tic Tac Toe mold.