Showing posts with label Fun Stuff. Show all posts

Sunday, December 14, 2014

Vintage Doily Window Ornaments: Part 2


A few days ago I posted on how to snowflake window ornaments from crocheted doilies. Here are a few of the finished results. My granddaughter, Olivia, and two of her friends had a great time sprinkling the glitter on the doilies. Of course, the island counter in the kitchen was one sticky mess.

A spray adhesive was used to apply the glitter. The technique was more like spray, sprinkle and shake. The excess glitter was collected off the craft trays for a future project.


My personal taste leaned more toward white sparkle and iridescent shred glitters, but the girls were all about pink and purple. No matter the color of glitter used, they were all beautiful. Each of the girls took home two snowflake doilies to hang in the bedroom window.


Friday, December 12, 2014

Vintage Doily Snowflakes

I am always in search of new craft ideas to do with the grandkids. Last night we mixed glue and water to make a DIY fabric stiffener for these doilies that will be used to hang in windows for the holidays.

My five-year old grandson got a bit carried away with the dipping process and we may have to let his doilies dry for another night.

Tonight, we will be using glitter spray on the snowflake doilies and then hanging them from the sliding glass doors using suction cup holders. The kids are excited and I will post the final glittered snowflakes tomorrow.

Hobby Lobby sells doilies in 12-packs at a reasonable price, or check out Ebay. Here is what you will need for this project.


  • 50:50 ration of white glue to water. Mix well in an large mixing bowl until the consistency of milk.
  • Cloth doilies
  • Plastic garbage bag for laying out the doilies after they are immersed in the stiffener
  • Spray glitter product (or you can spray the dried doilies with adhesive glue spray and sprinkle with glitter
  • Suction cup window hangers
  • Invisible thread for hanging the snowflakes


Submerge each doily into the glue mixture until fully saturated. Gently squeeze away any excess liquid and lay the doily flat on the plastic garbage bag.


Allow the doilies to air dry overnight. If they still appear to be damp, let them set out until completely stiff and there is no sign of moisture.


Gently lift the doilies from the plastic bag and flip them over to allow air to completely circulate to both the front and back sides of the fabric. You can either hang the doily snowflakes as is, or add sparkle by applying iridescent glitter to each side. (see my Part 2 post for using glitter).

The stiffened doilies also look nice inside a picture frame. Remove the frame's glass and cut and cover a piece of cardboard to fit the frame opening. Burlap material works well, or use brown Kraft paper or scrapbook paper. Hot glue the doilies in place.

Saturday, November 15, 2014

Make These Fun Robot Soaps

Make this Robot Soap These Robo-Soaps are fun and easy to make using Mold Market's Robot mold. There are countless variations you can use with our GPE water dissolving paper. We have even included a FREE template in this post.

Here are a few of the soaps made by Sophie Soap Chick. Instructions to make Robo-Soaps are given below. These soaps are perfectly sized for little hands.

Here's What You Need:

  • Mold Market's Robot Mold
  • Water Dissolving Paper ( to print Robot Chest Parts)
  • Fragrance Oil and Soap Colorants
  • Clear and white Soap Base
  • Alcohol Spray
  • Soap Injector Tool

  1. To make the robot, melt 7 cubes of Clear Soap Base in the microwave. Heat in a glass measuring cup in short bursts of heat until melted. The pouring temperature should be about 140 degrees.
  2. Print and cut out Robot Chest Parts using the Water Dissolving Paper (instructions included
    when you purchase the paper from GoPlanetEarth).
  3. Select chest designs and colors to coordinate with the color of the eyes, hands, feet, and main body. So depending on what design you choose, pick a color that corresponds with it.
  4. If you want to keep the robot plain, pour a thin layer of Clear Soap Base and once almost set, gently lay the cut out of the robot chest down in that area and spray the alcohol spray on the back to make it lay properly. Once that was close to being set, continue with another layer of clear and repeat until finished filling the mold.
  5. If you want the eyes, feet, and hands to be another color:  melt a cube of White Soap Base and mix that with the color of your choice and add  fragrance. Use the Soap Injector Tool to fill in those areas.
  6.  When these areas have set up, pour a layer of clear soap base and follow the above steps to get your perfect robot.
  7. If you wanted to have a shine through of color as well you would continue with all the above steps and once you are at the last level to pour, use a color instead of clear. 
Sophie Soap Chicks Review:
No matter what way you choose, you can’t go wrong with this awesome mold!

Click here to save the PDF file for robot parts to print onto the GPE Water Dissolving Paper.

Sunday, November 02, 2014

Franken Soap...Fun Party Favors


Sophie Soap Chick has been at it again. She created a number of ghoulish soaps to inspire you. Mold Market's Beveled Square mold was used for the above Franken-soap design. These soaps aren't just for Halloween, they are fun soaps to be used all year round.


I plan to make these soaps for my grandson's schoolmates when I read the book Frankenstein Makes a Sandwich by Adam Rex.

SUPPLIES


 HOW TO

Green Head:
Melt six cubes of white soap base in microwave safe measuring cup. You will want a pouring temperature of around 140 degrees. Remove from microwave; add fragrance and 2 drops of GPE Neon Green colorant.

Spray the inside of the Beveled Border mold cavity with rubbing alcohol and then pour soap.Allow to set up until firm before removing from the mold.

Face:
Melt six cubes of clear soap base in the same manner as the white. Add a few drops of black colorant to the melted soap and pour into the jelly roll tray.


After the black is set, repeat the steps with White Soap Base to use for the back of the eyes. Use the Recessed Smoother Soap Tool to out the black pupils, hair, eyelids, nose, and stitches from the layer of black soap you removed from the jelly roll tray.

When the white soap is set, carve out the back parts of the eye and made sure they fit behind the already carved eyelids. Once all the cut-outs are completed, melt a block of Clear Soap Base and  attach all the facial features!

Now you have a creepy and spooky Franken Soap!


Clear Melt and Pour Soap Base
Clear Soap Base from GoPlanetEarth


Sunday, October 26, 2014

Breakfast Worms


I promised to make these with the grandkids last month. Last night, we finally found time to create these slimy worms to celebrate Halloween. The kids are so excied to take take a baggie full of these worms in their lunch on Monday to share with friends.

For those interested, here is the delicious recipe.


INGREDIENTS:

  • 1 pkg. (6 ox) purple gelatin/jello
  • 3/4 ounce (3 envelops) unflavored gelatin
  • 3 cups boiling water
  • 3/4 cups heavy whipping cream
  • green and red food coloring
  • 100 plastic straws with bendable necks


HOW TO:

  1. You will need a container that holds at least 4 cups of liquid and is as tall as it wide (so that the jello mixture will fill all the straws). 
  2. Make sure straws are flush with the bottom of the container. The bendable part of the straw should be fully extended and facing toward the bottom of the container.
  3. I used rubber bands to help hold the straws together.
  4. Combine the flavored and unflavored gelatin in a bowl. Stir in the boiling water and stir until completely dissolved. Set aside for about 20 minutes before stirring in the whipping cream.
  5. Add 20 drops of green food coloring and 10 drops of red.
  6. Place the container of straws in another container to catch any overflow.
  7. Slowly pour the jello mixture into the straws. There will be jello that seeps up the sides of the container. That is OK. As long as the straws are tightly packed, the jello will fill the straws.
  8. Chill the jello filled straws overnight. This is where it gets messy.
  9. Run warm water the sides of the container that holds the straw. Wiggle the straws around until you are able to remove them.
  10. There will be plenty of jello blob that follows this removal process. You don't want any of that mess.
  11. Gently extract the jello worm from each straw by tightly holding the top of the straw and applying pressure down the entire length of the straw with your thumb and forefinger.
  12. The straws will be slippery, so you may need to wipe them with a paper towel before you extract the worm.
  13. Place extracted worms in a bowl and refrigerate until ready to serve.


Thursday, October 09, 2014

Oh the Things You Can Do With a Drawer!


This idea started with a small dresser I purchased at a garage sale for $30. At the time, I was clueless what I would do with this piece of furniture until yesterday when I learned a good friend's father had passed away suddenly. I wanted to gift something more than the usual florist arrangements. I surveyed what I had on hand and pick up additional items at the local farmer's market to make a Bountiful Blessings basket.

I started by spray painting the drawer in contrasting fall colors. The local farm down the road donated a garbage bag full of  unbundled straw which I used to fill the drawer.

Holes were drilled in the sides of the drawer to create faux handles. I used the straw rope that was attached to the dried vines I purchased at the market.

The drawer knobs were reattached for decoration and the Bountiful Blessings lettering was applied.

 I played around with the arrangement to get a feel for item placement and balance. The Osage Oranges were a great addition and freely drop from the trees that line my property.


Osage Oranges


Green and orange ribbon was casually woven throughout the arrangement and hot glued in place.

There were faux autumn leaves leftover from a Halloween costume I made for my granddaughter. They were a perfect fit for my Bountiful Blessings basket. With a few snips of my garden clippers I added some colorful oak leaf branches.


Once the funeral is over, this arrangement will make a wonderful addition to the front porch as a memorial to a special dad.

The total cost of this DIY arrangement was $30 and it will have more meaning to my friend than any florist arrangement I could have sent.

Tuesday, September 09, 2014

The Birthday Chair


I recently attended a birthday party the the daughter of a close friend. I wanted to do something extra special and decided to re-purpose a desk chair for her bedroom. Upon seeing the chair, Chloe exclaimed, "Yay, now I can get rid of the boring chair that I have!"  I took that as affirmation that she loved the chair as much as I did.

Since then, I was commissioned to do another chair identical to this one and I'm quite happy to be dipping my paint brush in colors into the midnight hour.

My Crying Chairs are made for the outdoors, but this birthday chair is for indoor use only. It can be personalized with or without a name or date and is perfect for a sun room or enclosed pool or patio area.


My grandkids were invited to the party and I placed their gift on the chair seat and attached a couple of balloons. They loved it!

The chairs I repurpose are labor intensive, but when I see the gratitude in the face of the receiver, it's worth every minute of the time invested.

As with my Crying Chairs, a personalized poem that fits the occasion is attached to each uniquely designed chair.


Friday, June 20, 2014

DIY Friendship Plaque


I've been on a crafting frenzy since I returned from Spokane. This is my latest project and I am pleased with the results. The layout was the most time consuming.

The canvas board was left-over from my granddaughter's birthday. It was painted in rainbow covers, but it didn't matter since I was going to cover the canvas with various papers.

The paper shown to the left was printed on the computer, but other papers used were scrapbook papers or handmade.

Paper punches were used to create decorative edges and satin ribbon was added for embellishment.


Mod Podge was used as the glue and sealer for this project. A thin coat was applied to the canvas and also to the back of each paper. A sponge brush works best for the application process.

I took a picture of the layout before applying the Mod Podge and used it as a reference when positioning the pieces. The lettering was printed on handmade paper and trimmed to fit.

The colors, arrangement of papers, embellishments and design elements are endless. Consider adding vintage buttons, jewels or pearls for a 3-D effect.


Wednesday, June 18, 2014

Rustic Recycled Wall Plaque


My recent trip to our local Goodwill yielded some great finds. I picked up this wooden 4 x 24" plaque for $1.99. It previously read Bordeaux but that was about to change, as shown above.


I recently returned from a trip to Spokane to meet with my business partner, Jefre. We have had many laughs about his over-abundant use of saying, It's All Good and I  couldn't help myself, I had to make him this wall plaque.

I peeled off the original Bordeaux paper layer and cleaned the plaque the best I could; any rough areas were sanded. Both the front and back sides were then given a coat of matte black paint (be sure to do this outdoors). Allow to dry.


While the board was drying, I designed the lettering using MS Publisher setting my print page as 4 x 24". The extended length required three sheets of paper which were cut and trimmed to fit the front of the board.


Position the three sheets as close together  as you can without overlapping the edges. Tape the underside of the papers to keep the lined edges in place.

Align the paper onto the board, flip the board to the back side and use a pencil to trace the outline of the cut.

Cut along the penciled area and trim if necessary to fit the board.


Apply a thin coat of Mod Podge to the face of the board. Set aside and apply a thick coat of Mod Podge to the back of the paper. Make sure you apply the Mod Podge in one direction.

I used a foam brush to apply the Mod Podge mixture which are readily available from Home Depot or any hardware store.

Position the paper onto the board and remove any air bubbles with a roller.Allow to dry for two hours before applying a top coat of Mod Podge.


The Mod Podge should be applied to the front of the paper in thin coats and all in the same direction. Make sure to apply the mixture along the edges of the plaque.

I used two thin coats of Mod Podge for this plaque and let it dry overnight. Allow the first layer to dry for at least 15 minutes before applying the next layer.


To add interest, I mixed a small amount of Burnt Umber Acrylic paint with water and brushed on in random places before applying the Mod Podge. This technique will really depend on the type of paper you have used. I used a heavier gauge handmade paper for this plaque and it readily accepted the brushed paint. Thinner paper may not be so kind.

Allow the plaque (or project) to set up overnight. If you need to speed up the process, you can use a blow dryer on a low setting.


Saturday, May 17, 2014

Rainbow Art Party for Kids


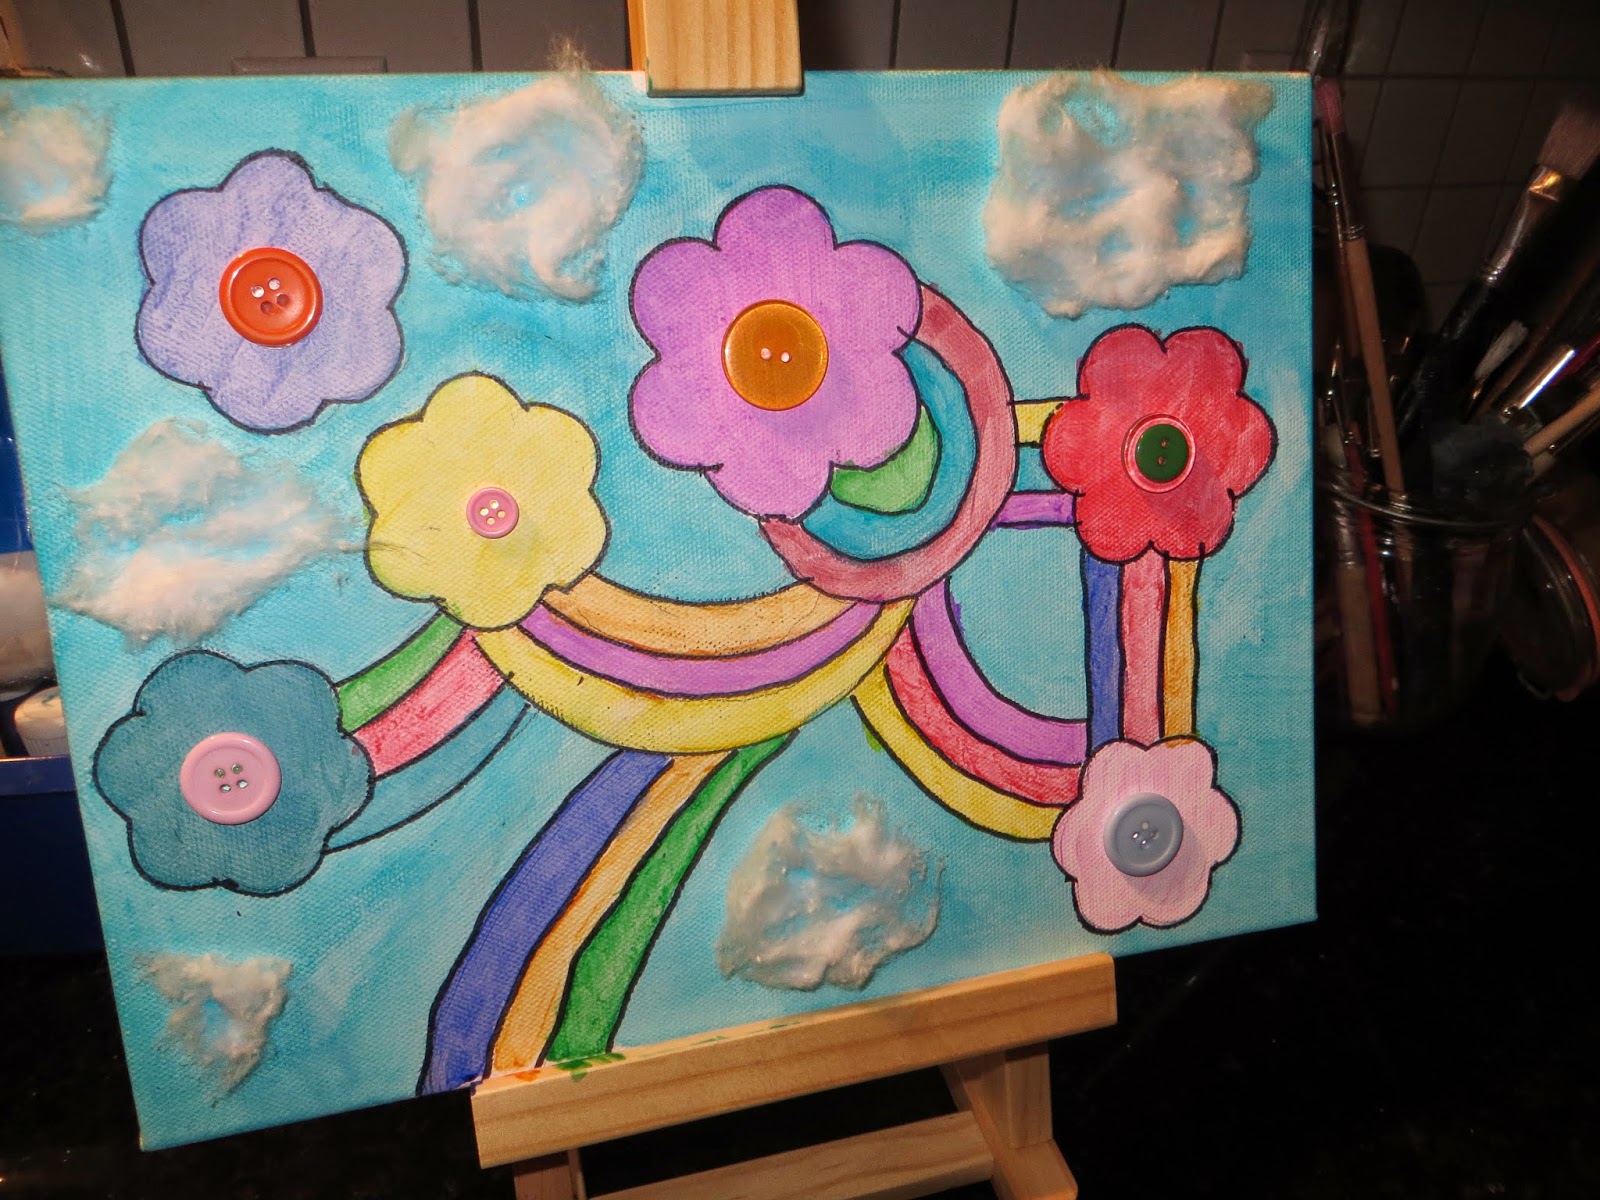
This past week I've been assembling everything I need for my granddaughter's birthday party. She decided on a rainbow theme to celebrate my newly published children's book titled Remember the Rainbow. Olivia loves to draw and paint so I suggested a Rainbow Art Party.


Each guest will receive a canvas with a pencil drawn design of the rainbow (shown left). Once painted, they can outline with a black Sharpie, add cotton clouds and colorful buttons.

A chalkboard greeting outside the front door  welcomes party guests.

Pizza, rainbow Slurpee, a rainbow candy bar and pink lemonade are all on the menu.


The backdrop for the photo shoot are plastic table clothes hung from a wooden dowel. I'll post pictures later of all the girls. Each girl will receive a frame to hold their photo shoot picture.


The party includes:


  • Lemonade stand
  • Jumbo rainbow slurpee
  • A colorful synergy maze
  • Gift bags that contain Crayola window markers, a copy of my new book, flavored lip gloss and a six pack of rainbow colored nail polish.
  • Popcorn cones


What is a colorful synergy maze?

Synergy is created when things work in concert together to create an outcome that done through the joint effort and cooperative action of two or more individuals.


My synergy maze uses yarn. Each child is given a color and must find their way to the end of their color to receive their gift bag. What makes it fun is that all the different colors are interwoven around obstacles and will require the joint effort of each participant to untangle their way to the prize.

This will be done outdoors which is great for helping the kids expend excess energy. They wind their yarn around a cover toilet paper roll.


I will post follow-up pics once the party gets into full gear and the final details are executed... like the giant rainbow slurpee, lemonade stand and synergy maze.

The set-up has been fun, it's the take-down that I'm dreading. But, if it creates memories for my granddaughter, it is all worth it.