Friday, May 23, 2014

Easy DIY Get Well Greeting Card


I wanted to send a couple of Get Well cards to friends this week and decided to make my own. This was the result and it was easy-peasy to do. I've even included a printable template for you to use. Sorry, you'll have to provide your own band-aids and gauze (said with a big grin).

You can print a special greeting on the flip side of the card, or just opt to sign your name and call it good.

I used two sheets of creme color card stock paper. The card is sized to fit inside a 6 x 9" catalog envelope. It may require additional postage so you may want to weigh before mailing.

Snag the template here.

Tuesday, May 20, 2014

DIY Birthday Popcorn Cones & Stand


My granddaughter wanted popcorn at her birthday party. In keeping with the Rainbow Art Party theme I created popcorn cones and stand. It was inexpensive and made eating popcorn way more fun. The cones can also be filled with assorted candies for each party guest.

Another great way to decorate the cone box is with your child's hand prints dipped in finger paint. How cute (and fun) to have colorful hand prints covering the white paper.

You will need:

  • White craft paper
  • Color printer
  • White card stock
  • Clear tape
  • 6-inch wide netting, cut into 12-15" lengths
  • Postal box that is sized for shoes
  • Double-sided tape
  • Box cutter
  • Masking or painters tape
  • Cone template (found here)

How To:

  1. Assemble box, tape ends
  2. Use box cutter to cut 6 holes. Make holes large enough to hold the cones.
  3. Tape around edges of the cuts with masking or painters tape.
  4. Wrap box with white Kraft paper( like you would a gift).
  5. Use box cutter to make "X" cuts in each circle cut-out. Fold back the white paper in each hole and secure to inside of box with clear tape.
  6. Decorate box as desired. I used grosgrain ribbon and cutout the circle shapes that appeared on the cones. See attached PDF file.
  7. Print cone design on card stock paper and use the cone template to trace cone design.
  8. Cut out cone shape, roll and secure with clear tape.


Saturday, May 17, 2014

Rainbow Art Party for Kids


This past week I've been assembling everything I need for my granddaughter's birthday party. She decided on a rainbow theme to celebrate my newly published children's book titled Remember the Rainbow. Olivia loves to draw and paint so I suggested a Rainbow Art Party.


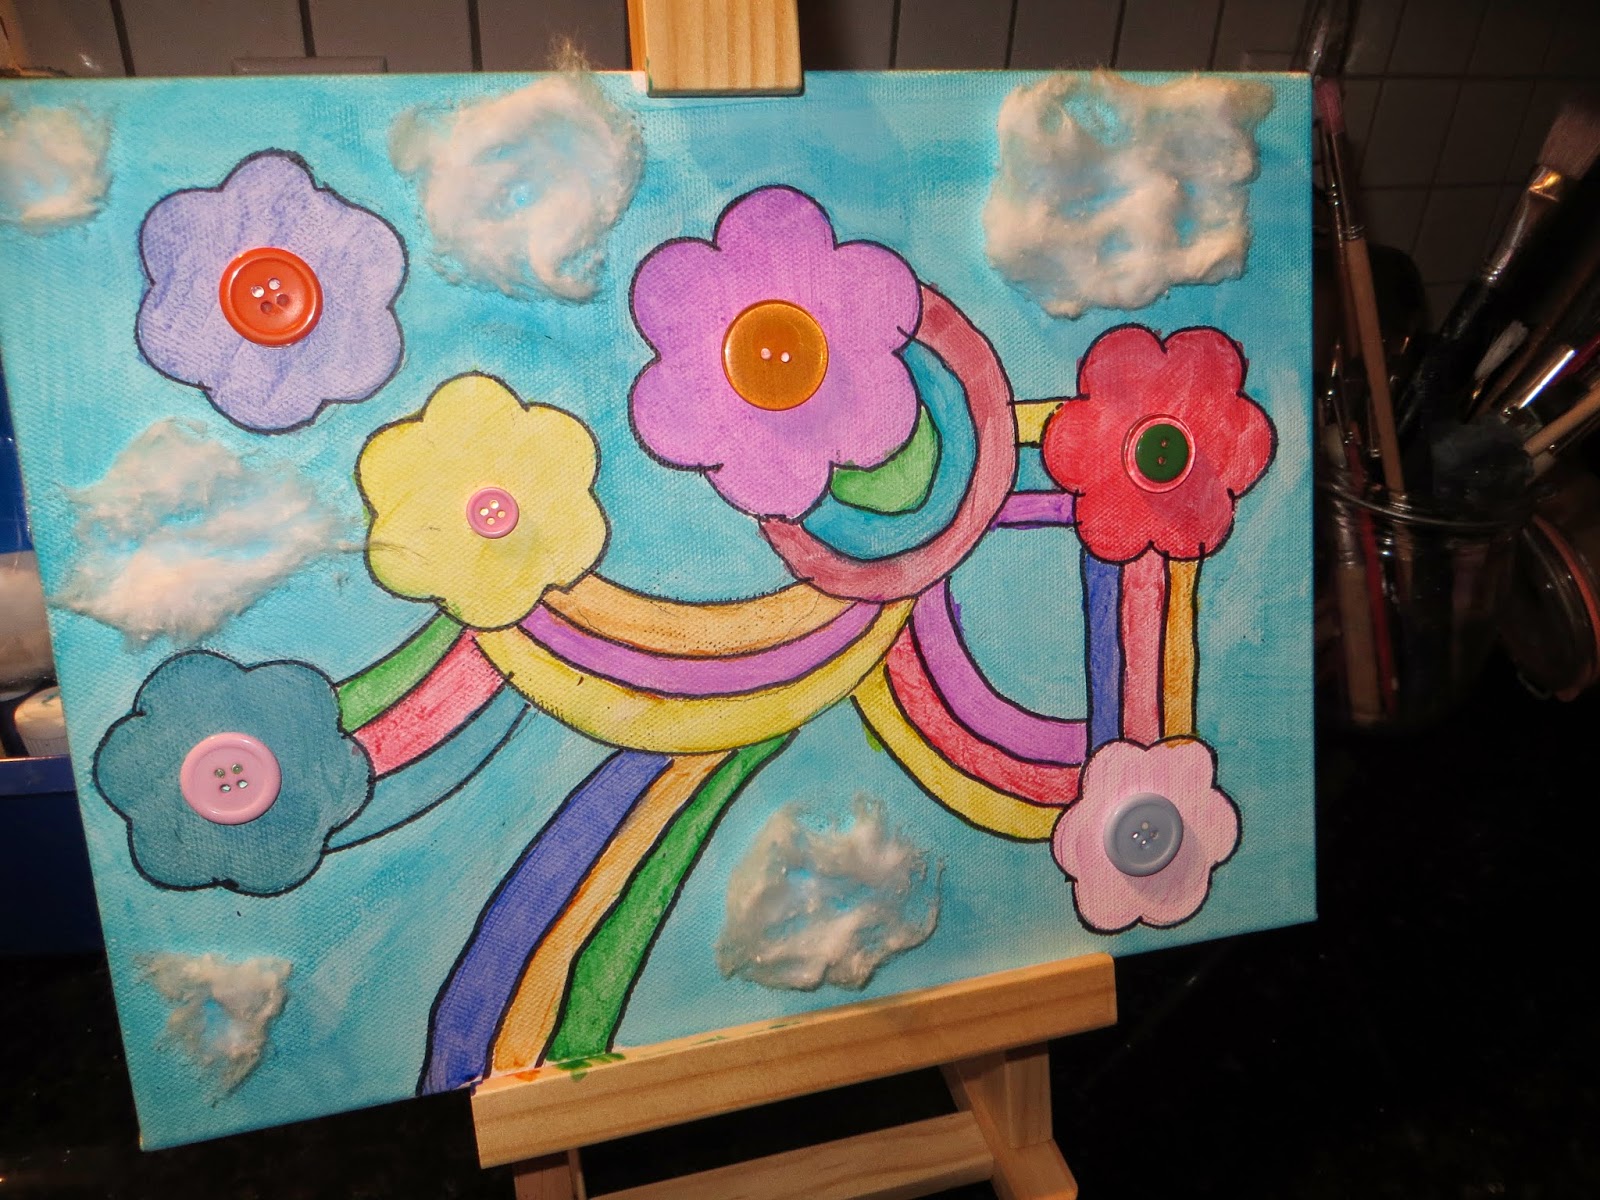
Each guest will receive a canvas with a pencil drawn design of the rainbow (shown left). Once painted, they can outline with a black Sharpie, add cotton clouds and colorful buttons.

A chalkboard greeting outside the front door  welcomes party guests.

Pizza, rainbow Slurpee, a rainbow candy bar and pink lemonade are all on the menu.


The backdrop for the photo shoot are plastic table clothes hung from a wooden dowel. I'll post pictures later of all the girls. Each girl will receive a frame to hold their photo shoot picture.


The party includes:


  • Lemonade stand
  • Jumbo rainbow slurpee
  • A colorful synergy maze
  • Gift bags that contain Crayola window markers, a copy of my new book, flavored lip gloss and a six pack of rainbow colored nail polish.
  • Popcorn cones


What is a colorful synergy maze?

Synergy is created when things work in concert together to create an outcome that done through the joint effort and cooperative action of two or more individuals.


My synergy maze uses yarn. Each child is given a color and must find their way to the end of their color to receive their gift bag. What makes it fun is that all the different colors are interwoven around obstacles and will require the joint effort of each participant to untangle their way to the prize.

This will be done outdoors which is great for helping the kids expend excess energy. They wind their yarn around a cover toilet paper roll.


I will post follow-up pics once the party gets into full gear and the final details are executed... like the giant rainbow slurpee, lemonade stand and synergy maze.

The set-up has been fun, it's the take-down that I'm dreading. But, if it creates memories for my granddaughter, it is all worth it.


Wednesday, May 14, 2014

Melt & Pour Soap Making: Bunny Rabbit Soap


I meant to have this soap posted before Easter but it didn't happen due to my crazy travel schedule. In March, I asked Sophie Soap Chick to come up with an Easter bunny soap using Mold Market's cupcake base and bath bomb mold. Sure enough, she came through with this adorable design. I love it!

Items Used:


Here are Sophie Soap Chick's instructions:
 
  1. You can start with either the head or the cupcake body. I used white soaps base for. For the head, all I used was white soap base and fragrance (Make sure to make extra and pour into the 8-inch Silicone Roll Tray for the ears that you will later carve out). For the body, I used white soap base mixed with Neon Pink Colorant (Only a drop or so) and filled the base of the cupcake mold. Make sure to also melt down extra so you can pour the remainder in the 8-inch Silicone Roll Tray for the inside of ears and nose. You will also need to melt down some clear soap base mixed with Black Oxide Colorant for the eyes and mouth and will also be put in the tray mold.
  2. Make sure to melt down the ear part first so you can work on that while the black is setting. To cut the ears I used the Recessed Smoother Tool and it took a little while to make them look perfect. Make sure to also smooth the edges to give it a rounder look. The same goes for the inside pink part.
  3. Once you have all these made and set, you can then melt some clear soap base and start attaching everything. I started attaching the head and the body first. I then moved on to putting the pink inner ear on the white ear. After that dried, I attached the ears on the body. I found it easier to attach them first and then the eyes and mouth.
 
This soap took about an hour or so, but was SUPER EASY to make. He is so cute you can make anytime, not just for Easter! 

Monday, May 05, 2014

Melt & Pour Soap Making: Meet Mini Man


Mold Market's new Mini Man soap mold is sure to be a hit with kids. Make them in blue, green, yellow, orange...any color you want.

Each mold has three cavities and makes approximately a 3.5 ounce bar that is 3-inches in diameter x 1 3/16" deep.

The use of a soap injector is necessary to fill in the accent areas of the eyes, hair, glasses and mouth. 

NOW IN STOCK and will be online this week.


How to Make Flower Pot Soaps


FINALLY! The flowers are beginning to bloom in Michigan. To celebrate, Sophie Soap Chick, planted a few soap flowers in Mold Market's flower pot mold. Sophie shares the 'how-to' information below.

Items Used:


First, I started mixing together ingredients to make the flower pots. I used white soap base and then added two drops of brown oxide and 1 small drop of orange oxide (Don’t forget to add fragrance). This made the creamy looking brown color that works perfect as a pot. I then poured this in the Mini Flower Pot Mold and let set.
Flower Pot Halves


While the Mini Flower Pot was setting, I moved on to making the flowers. For this I used the 8-inch Silicone Roll Tray. For the yellow flowers, I melted down white soap base and then added two drops of Neon Yellow. Make sure to spray down the tray with alcohol spray so there will be no sticking. I only poured the yellow until it covered the bottom. Do not make it too thick or your flowers wont stand correctly on the pot. After the yellow set, I then continued this process to make the pink flowers, the flower stems & leaves, and the dirt (one black and one brown, later will cut little pieces and mix them together).

During those setting, I took out the Mini Flower Pots and began cutting the tops with the Recessed Smoother Soap Tool. Make sure to keep a lip to hold in the dirt and to give the effect of a real flower pot. Once they were both even and fit properly, I used clear soap base to attach the two parts. Some of mine didn't stand up straight, so to fix this you can use the tool again and shave the bottom a little bit until it sits properly.

Join the two flower pot halves
with clear soap base.
To make the flowers, I used the smallest of the Flower Cutter Set and used it with the pink and yellow. For the stems I used the Recessed Smoother Soap Tool and then rolled with my fingers. For the leaves, I used the same tool and carved them out by hand. To attach all these I used the clear soap base.

For the dirt, I used the black and brown that I made out of the tray and used the same Recessed Smoother Tool. I used the curved end and with a flicking motion, popped out little pieces of black and then brown. This did take a little while, but after getting the hang out it becomes quicker. Make sure to attach the flowers in the pot prior to putting the dirt in. Once the flowers were in place of where I wanted them, I then sprinkled the dirt all over.

These turned out SUPER CUTE and I hope you all have a great time making these! Although, these take a few hours to make, the end result is so worth it!!!