Sunday, August 30, 2009

Melt & Pour Soaps: Autumn / Halloween Roll-Ups

Autumn Roll Up Soaps from GoPlanetEarth.com
GoPlanetEarth's newest soaping project will be posted soon: Autumn Roll Up soaps. Just in time for the Halloween and Fall season. We used pumpkin orange and black oxide to colors the roll-ups picutred; but, you can make them in a host of other complementary colors. Consider red and green for Christmas or red and white for Valentine's Day. Get creative by using different cut out shapes. We used round cutters, but there's plenty of other options such as hearts, Christmas trees, candy canes... you get the idea.


How to Make Autumn Roll Up Melt & Pour Soaps
Watch for GoPlanet's upcoming tutorial on how to make these soaps. The soaps pictured were scented with Autumn Woods, but other Fall fragrances such as A Roll in the Hay, Harvest Moon, Apple Autumn, Pumpkin and Harvest Spice are sure to be a hit. All of these soap scents can be purchased from GoPlanetEarth.com.


Friday, August 28, 2009

New Tutorial Web Site is Launched


It's been in the works for some time now, but our new soap making tutorial web site launched today. There are still a few projects to upload and many more new projects to be added. However, we wanted to get the site up and running in time for the holiday & Fall craft season.

This new site is where you will find all kinds of melt and pour soap making projects, have your questions answered, and find helpful information and resources about soap making. We welcome your input and soap project submissions. There is a "Submit Project" link where you can send us your soap making successes (and failures).

All of the video learning tutorials are offered free of charge with a minimal charge for printed tutorials.

I hope you will take time to check out the new site and let us know what you think. LearnSoapMaking.com

Monday, August 10, 2009

Beyond Soap: My Take on Lawn Art


Remember lawn ornaments made from cut-out wooden shapes? My grandparents we're big on these types of lawn ornaments. I've never been a fan and personally think you should immediately remove any that are currently perched in your lawn. That's not to say I don't like yard art. My hubby and I have our own take on lawn art (pictured above). Our metal wine lady was a display nabbed from a local wine store. She is stately perched amidst flowers ready to pour arriving guests a glass of wine. Note her cool rhinestone earring.


If you have the above cut-outs in your lawn, you should remove immediately!


We are adding a new piece of yard art. The wine butler below is being prepped for installation by the front door. He will hold a chalkboard menu that we can use to write personalized messages to arriving guests.

Sunday, August 09, 2009

Version 2 of Sushi Soap Log a Success!


I was so delighted with how version 2 of the Sushi Soap Log project played out. I was a bit apprehensive on how well the shredded soap would hold together when the soap log was sliced, but it turned out just fine. The upcoming tutorial will provide some helpful pointers based on issues we encountered while making the soap. We'll be sharing the online tutorial with you soon.


I'm hoping to show you creative packaging for this soap. Still working out the details. I'll post once I have all my ducks in a row. In the meantime, enjoy your Sunday! Im off to that wedding shower that I posted about here.


Salty Watermelon Soap Slices...yummm!

One of our latest melt and pour soaping projects is a salty watermelon log scented with GoPlanet's watermelon taffy fragrance. The tutorial will be online soon. The soap log was made using Mold Market mold #142 rounded loaf mold. Our finished log yielded 11 watermelon slices in generous 1-inch thick cuts. Each slice averages 4 ounces.


Melt & Pour Watermelon Soap
If you want to get even more creative, you can add strips of black soap to imitate black watermelon seeds. We opted for a salty version this go around. The soaps have the look of jumbo sour watermelon candy; the kind I use to buy as a kid in days gone by.


Mold Market Rounded Loaf Soap Mold
The Mold Market loaf mold used is pictured above and available at GoPlanetEarth.com.


Friday, August 07, 2009

Beyond Soap: Wrapping a Shower Gift (Cheaply!)

I'm going to a wedding shower this weekend and have a number of packages to wrap for the event. Since I won't have time to shop for gift wrap (nor do I want to spend the money on gift wrap), I began brain-storming on ways I could wrap a gift so that it had a somewhat upscale organic look without spending $$. I started scavenging things available around my house and in the warehouse. OK, let me just put it out there... I was looking for FREE stuff.


This is what I came up with. I snagged some sheets of the brown kraft paper that we have on rolls in the warehouse. I used this to wrap the gift boxes. To add some color and jazz it up a bit, I overwrapped the kraft paper using some printed cellophane rolls that I had around the house. The design I used happen to be a spiral print.


Hmmm... what to do about a bow? I wanted something that would fit the natural theme of the wrap. AH, hah! How about cutting and curling strips of the brown kraft paper. Perfect! I curled 6-8 strips and then stapled them together. I grabbed a hank of raffia from the warehouse on my way out the door. It would be ideal for dressing up the kraft paper and would lend itself to the "earthy" feel I was going for.


Exacta-mo! It worked. A few strands of raffia centered on top of the curled kraft strips was just the ticket.


Oh dear, what to do about a card. I hadn't even given this a thought. No time to run out and buy one. What could I possibly do in Publisher? I know! Some fun quotes about marriage in various fonts and colors. Yes! That will work. I printed out the quotes on white cardstock then added a second page with a personalized greeting . Some natural raffia threaded through a couple of hold punches and I was good to go. The card pages were intact.


The final touch was a strip of brown kraft paper around the outside of the card. It was held in place by a clear 4 x 2 inch label printed with the bride and groom's names and a quote from their wedding invitation. Since I had to print a sheet of 10 labels, I used the remainder of the labels to help hold the raffia ribbon and kraft strips in place on the wrapped packages.


Part 2 of How to Make a Sushi Soap Log

Mlet & Pour Soap Making: Sushi Soap Log
Okee-dokee, the second part of the sushi soap log tutorial is complete. We are starting work on a Version 2 of this soap making tutorial using a different technique. It will be an interesting trial and error learning curve for our staff. If it's a flop, we'll let you know. And, yes, we do have project ideas that are a bust and tend to share the less desirable results. We wouldn't want you to think we are perfect!

It's Friday and I'm smiling. Enjoy the weekend.


Thursday, August 06, 2009

Part One of Melt & Pour Sushi Soap Log

How to Make Melt & Pour Sushi Soap Log
Part One of the Sushi Soap Log tutorial is now live. You can view it below. Hope to have Part Two online within the next few days. Enjoy! Email with any questions.


New Soap Making Tutorial...Coming Soon

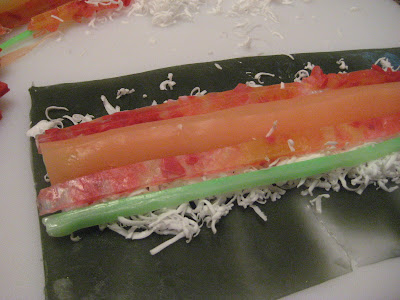
It can't possibly be August. Summer is flying by and it's been busy, busy, busy around here. We're continuing work on a new web site that we hope to launch early Fall and there are a number of new mold designs in the works. With all this background activity, I've had little extra time to work on special projects. However, here is a sneak peek of a new tutorial on making sushi soap rolls. The tutorial will be released later this month and features two versions that demonstrate different techniques. I've pictured Version 1 in this post.

GoPlanet previously released a tutorial showing how to make a soap sushi roll using actual nori seaweed and included skin nuturing items such as adzuki beans, ground oats, and soy protein. These newest tutorials present a different take on the same themed soap.


The prep work for this project was a bit time consuming but yielded 13 soaps within approximately 2 hours. Sounds like alot of time, but consider this.
  • I made one sushi soap roll, but had prepped for two more rolls. I could have easily made additional rolls with minimal prep work.

  • This was a new project and some of the time involved the OOPS factor.

Depending on your level of Melt & Pour soaping experience, I believe it's possible to make 39-40 soaps in about 2 hours. Not bad! My soaps weighed in at around 1.75 to 2 ounces per slice. I'll share more of the details and working notes once the tutorial is released.