Showing posts sorted by relevance for query latex. Sort by date Show all posts

Wednesday, October 17, 2012

How to Make Realistic 3-D Wounds

Last night I assisted my grandson with a school project that involved decorating a skeleton. Of course, he wanted a scary look and with a little help from latex rubber, we did just that. Since the concept behind the project was to learn the bones of the human skeletal frame, we thought a few vital organs would be appropriate: heart, brain and tendon.

My zombie face post from last week prompted a number of how-to requests. There are a couple of different ways to make ugly scars or wounds. The method in my pictorial video uses PVA water soluble glue rather than liquid latex. I purchased both online.

The PVA glue is ideal if you want to build up the wounds directly onto to the skin. It's the method I used in the zombie face pictorial.

The second method is building up the wounds/scars with liquid latex and then using the PVA glue to adhere them to your skin.

The method below shows the liquid latex method.


Step One:
Using a disposable paint brush apply liquid latex to form the outline of the wound. A dabbing effect seems to work best. In this picture, I applied the latex to wax paper so that it would easily peel off once dried. Apply a second layer of latex to build up the base.

Step Two:
Roll up single ply strips of toilet paper to create the edges of the wound. Place the strips just inside the perimeter of the wound you created with latex.


Step Three:
Rip small sections of toilet paper and place inside the wound. Apply a thin layer of latex onto the wound an place the toilet paper into the wound. I used the end of a paint brush to saturate the toilet paper and squish it into place. Continue building up the wound with sections of toilet paper until you are satisfied with the look.


It doesn't look too realistic at this point, but trust me, in the end you will have a nice piece of fleshy skin.

Step Four:
After you have obtained the right look for your wound, apply one last layer of liquid latex. Allow to dry for at least two hours. It really needs to be thoroughly dry before you start apply the make-up.


Now... time to make it look realistic by applying make-up. It's likely you have most of this make-up in your cosmetic bag. If not, the Dollar Store is a great place to pick up colors or items needed.

Step Five:
Applying the color is the best part (at least in my opinion). I know this doesn't look like a heart, but it did to my 9 year old grandson. Of course, he had to add a few staples for effect.

We used 3 different shades red of lipstick. Using a make-up brush, we started with a darker shade of red along the perimeter and continued working the lighter red colors inward. A little brush here and there of black eye shadow also adds realism.

Liquid blood was brushed inside the wound and painted along the outside. I purchased my blood tube at a Spirit Halloween store. I'm sure you can also find it online. It's not necessary, but does lend itself to a more realistic look.


After Painting

Before Painting

We left a little more of the latex showing when making the tendon. The same red colors were used but with less intensity.

The picture to the left shows what the finished latex looked like prior to applying the make-up.

The design options are only limited by your imagination. Create bullet holes, peeling or aging skin, wounds, scars or cuts.

I'll be taking this to the next level with soaps. Can't wait to share. Stay in touch.

Friday, October 19, 2012

Melt & Pour Soap Making: Cupcake Brain Soaps


While my honey-man was at the Detroit Tigers game seated behind home plate, I was busy making cupcake brain soaps. First and foremost.... GO TIGERS!!! awesome game. Looking forward to the world's series.

These cupcakes were made with Mold Market's cupcake mold (only the bottom portion). The brain topping was made with our Decorator Pro piping tool and soap frosting recipe.


Pipe the brain with one of the tips included in the Decorator Pro kit. The soap frosting recipe can be found here. Take a peek at my post about using liquid latex for added effects. The "gory stuff in the brain is made from liquid latex.

This is such an easy project. Pour the cupcake base, then pipe out the soap frosting onto the top of the cupcake base. A thin layer of clear soap is used to seat the piped brain onto the top of the cupcake. Brush red lipstick colors into the brain crevices and then insert the liquid latex part.

The liquid latex can be removed before using the soap in the bath or shower. Kids will love applying the latex wounds to their body while in the tub.

WARNING: These should not be used with people who have a latex allergy and the soap labels should clearly indicate this warning.


Sunday, October 07, 2012

GPE's Mad Scientist Halloween Costume


It's that time of year for scare and fright. My 9-year old grandson is all about gore this year. It was decided (with parental guidance) that a Mad Scientist costume would be appropriate. Since face masks or face paint is not allowed at their school Halloween party, we opted to make the lab coat the primary focal point of his costume.

I ordered a basic child's lab coat online. Cost was under $20 and also included a white mad scientist wig. The use of GoPlanetEarth products completed the look.

1) Latex gloves dipped or soaked in red colorant. I used both DWP red and liquid gel tomato red or red oxide. LET THE COLOR DRY COMPLETELY before attaching gloves to the lab coat.

2) Every mad scientist needs tubes filled with disgusting, yucky stuff. I filled a couple of GPE's 1 x 8" plastic salt tubes with 4 x 4 gauze sponges soaked in red colorant, uncooked oatmeal, water, corn syrup... whatever you can find around the house to make the tube look gory. Place a label on the tube to identify its contents. I decided on Monster Goo, Werewolf Blood and Rat Brains.

Seal the tube caps with super-glue to ensure none of the gory contents spill onto the classroom floor.
3) GPE's natural plastic tubes are a great addition to the mad sceientist's lab coat pockets.


4) It never hurts to add a few plastic spiders to the test tubes. The soap injector makes a great accessory for this lab coat costume.

5) Now for the blood and gore. Take the lab coat, colorants and paint brush outdoors for a creative painting session. I started by dipping a large craft paint brush into DWP red colorant (with water added). Dip the paint brush and throw the mixture onto the lab coat. Paint streaks onto the coat as well.

The last coloring step was taking tomato red or red oxide liquid gel color (add a small amount of water) and splattering onto the lab coat (with a paint brush).  The darker red color is a nice contrast to the DWP red.

6) Attach a few vinyl bats to the lab coat with super glue. I dipped an old cotton rag into the red paint and pinned to the shoulder area of the lab coat. The latex gloves were pinned to the lab coat pockets.

The only thing missing is the wig and the surgical shoe covers. My friend is bringing me shoe covers from the hospital. I will spray them with red colorant and have my grandson put them over his shoes.

My grandson gives this costume an A++ rating!

Sunday, January 13, 2008

A whole other meaning to the term "Hand Soap"

Now here's a bar of hand soap you can literally shake hands with. One thing's for certain; your house guests can't possibly miss it in the powder room. For heaven's sake! Why put out all those cutesy little guest soaps when you can put out a friendly, giant size hand? Just for the record, this baby topped the scale at 17.5 ounces. That's over one pound!!

This whole project evolved because my 4 1/2 year old grandson wanted to help me make soap. He insisted on wearing latex gloves just like NeeNee (between you and me... the only reason he wanted to help was to wear the gloves). Within minutes he became bored with the whole project until I suggested we make a "hand" soap using one of the latex gloves he was wearing. This immediately piqued his interest. Here is the result of our hands-on project (Yes, pun was intended!)


BTW...my grandson is taking the hand soap to show & tell day at his pre-school. I would love to record his version of how we made the soap. Surely it would find it's way into one of Art Linkletter's Kids Say the Darndest Things books. Did I mention he picked the blue color and apple fragrance? He told me he picked apple because I keep apple gum in my purse just for him, and blue because NeeNee's eyes are blue.


View the instructional video below:


Monday, October 11, 2010

Soap Dishes: The Project Begins

A few days ago I posted about a soap dish I was going to make. You can read that post here. On Sunday, I began the project. It takes about a week to complete. Here are photos of what has happened so far.

You need to pick your leaf. This is a leaf from one of my Yucca plants. Pick a leaf that has no holes (from insects) and is still fairly green. Many leaves are already turning brown due to the Autumn season. Those might not work so well. A leaf with pleny of veins is a perfect fit.

My neighbor mixed up the concrete. I'll have the correct mixing ratio posted soon. Basically, you just mix water into the concrete until you get a consistency as shown. It's very similar to the same consistency you want when making fizzing bath bombs. You want to be able to squeeze the mixture until it feels and looks like wet sand.


Once you have the right consistency, you pile the concrete mixture onto your leaf. The leaf is sitting on top of a pile of sand that is covered with a piece of plastic. Your goal is to create a curved area in the center of your leaf dish and the heaping sand helps to create this concave area.

Work with small amounts of the concrete to build up the leaf. Smooth with your gloved hands (we used latex gloves). You can also use a spray bottle filled with water and spritz as needed onto the concrete to help create a smooth surface.

Our leaf is complete. Now we must let it dry for about 3 days. I will be posting an update on this project once the concrete dries and the leaf is removed. At that point, the painting process begins. Oh what fun! Tomorrow night I'll be meeting with a group of friends to form even more leaves. Tonight, I'll be peeling apples (from a local orchard) to make an apple crisp to share tomorrow with my crafty friends. I've posted that recipe. The Apple Crisp is easy and awesome tasting. Add a dollop of vanilla ice cream and you're good to go.


EZ APPLE CRISP RECIPE:
  1. Core and peel 7 apples (I like to mix about 3 different varities of apples)
  2. Mix sliced apples with 3/4 cup brown sugar and place into a 9-inch square baking dish (or something of similar size).
  3. In a separate bowl combine 1 1/4 cups flour, 1 cup white sugar (you can also use Splenda), 1 1/2 teaspoon ground cinnamon, 1/4 teaspoon salt.
  4. Add 3 tablespoons melted butter to one beaten egg. Stir into the flour mixture and spread evenly over the top of apples.
  5. Bake in preheated oven at 375 degrees for 35 minutes, or until topping is golden and crisp.
  6. Serves 8 people.

Thursday, October 11, 2012

Mad Scientist: Costume #2 with Slime


Last week, I posted pictures of my grandson's Mad Scientist costume for his upcoming backyard camp out. At age nine, he's all about the Halloween gore. However, for school it's not acceptable so we needed a back-up costume. This is it.

I purchased a second lab coat and dusted it with neon green powdered colorant (Yep, the same color used in soap making). I again used the salt tubes sold at GoPlanet and filled them with various ghoulish looking items. I also made some slime (see recipe below) that I will pin to the lab coat in various places. I won't do that until the day of his class party because the homemade slime needs to stay in the fridge until used.

I didn't have a pocket protector so I used a soft eyeglass case and stuffed it with some ink pens. Every scientist needs pens to formulate their calculations, right? I found some electrical wire and a couple of electrical wing nuts in the garage. Let's see... latex gloves, test tube vials, plastic syringe, creepy plastic spiders, a bat and of course, what's a lab cost without some kind of skeleton part?

Slime Recipe:
  • 1/4 cup glue (I used Elmer's, but any off brand will do)
  • 1 cup water
  • 1 tablespoon borax powder (you'll find this in the laundry isle of your grocery store)
  • 1/4 additional water (put this is a separate cup)
  • Ziploc bag
  • Food coloring (I used green)
 Add borax to one cup water. Stir until dissolved. Mix the glue and 1/4 cup water together (50/50 solution).

Add equal parts of the glue solution and borax solution in the Ziploc bag. One half cup of each solution will yield one cup of slime. Add food coloring and seal the bag. Knead mixture until it becomes putty-like. Store in the fridge inside a sealed bag when not in use.

Here's the squishy, gooey slime that will be part of the costume. Best part, kids can play with it even after Halloween is over.


Every Mad Scientist must keep records. I recovered the front and back of an old book (it was one of those hard cardboard baby books) with printed artwork. I didn't want to recreate pages, so I placed a rubber band around the outside of the book...seemed like something a mad scientist might do.
The back cover is a printout of chemistry equations and clearly indicates that this scientific book is the property of Dr. N. Telligent.

The little wiry gizmo by the book is going to be glued to the top of the mad scientist wig I purchased. It's just a bunch of gadgets glued to the top of a plastic storage container.

If your finances are strapped, head on over to a thrift store and purchase a white dress shirt for the lab coat. Cut of the shirt tails and use them to create extra pockets for the lab coat. Press the bottom of the shirt and stitch the hem for a nice finished look.


Monday, October 11, 2010

Soap Making: How to Make Gelato Soaps (Recipe #1)

A customer emailed a few weeks ago wanting me to post a recipe for Gelato Soaps. Hmmm... some of you may be wondering "What is Gelato?" Gelato is a type of Italian ice cream (slightly lower in fat). However, our Gelato soaps are calorie free and a perfect gift for the holiday season.


We have a couple of variations on the recipe. This is our Gelato Recipe #1. We'll be posting recipe #2 recipe in a few days along with a short tutorial on both.


Recipe #1 is made with the addition of our whipped body butter. It offers a nice creamy texture to the gelato and makes for a wonderful body wash. We even included some of our spa quality sea salts as an exfoliant (and some sugar as well to work as a scrub). The addition of citric acid gives a bit of fizz, but the Gelato isn't really meant to be a bath fizzie. It's more about moisturizing.

If using this recipe, I definitely suggest letting the mixture set up for 2-3 hours before using the ice cream scoop. It was hard to get the mixture to drop out of the scooper until it was slightly firm.

Gelato Recipe #1:

Put all dry ingredients in a large mixing bowl. Incorporate ingredients thoroughly.

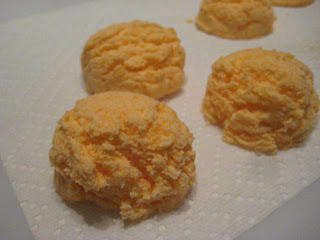
Next, combine the melted body butter, fragrance and color. Mix well and then slowly drizzle over the dry ingredients. You will want to put on latex (or something similar) to mix the wet into the dry ingredients. Squish the mixture until is looks like the consistency of wet sand. The mixture should hold together when squeezed in the palm of your hand (see above photo).

Using an ice cream scoop, scoop out balls of the gelato soap mixture. We were able to get 7-8 balls from the above recipe.

To Use:

Slice off a section of the gelato to use for your bath or shower. There are so many different ways to display your Gelato soap. Consider using a lidded plastic sundae cup along with a ice cream tasting spoon. Or, just display on a soap dish with a small cheese spreader. Use the cheese spreader to cut off serving portions of the Gelato Soap.